Snow sculpting tools
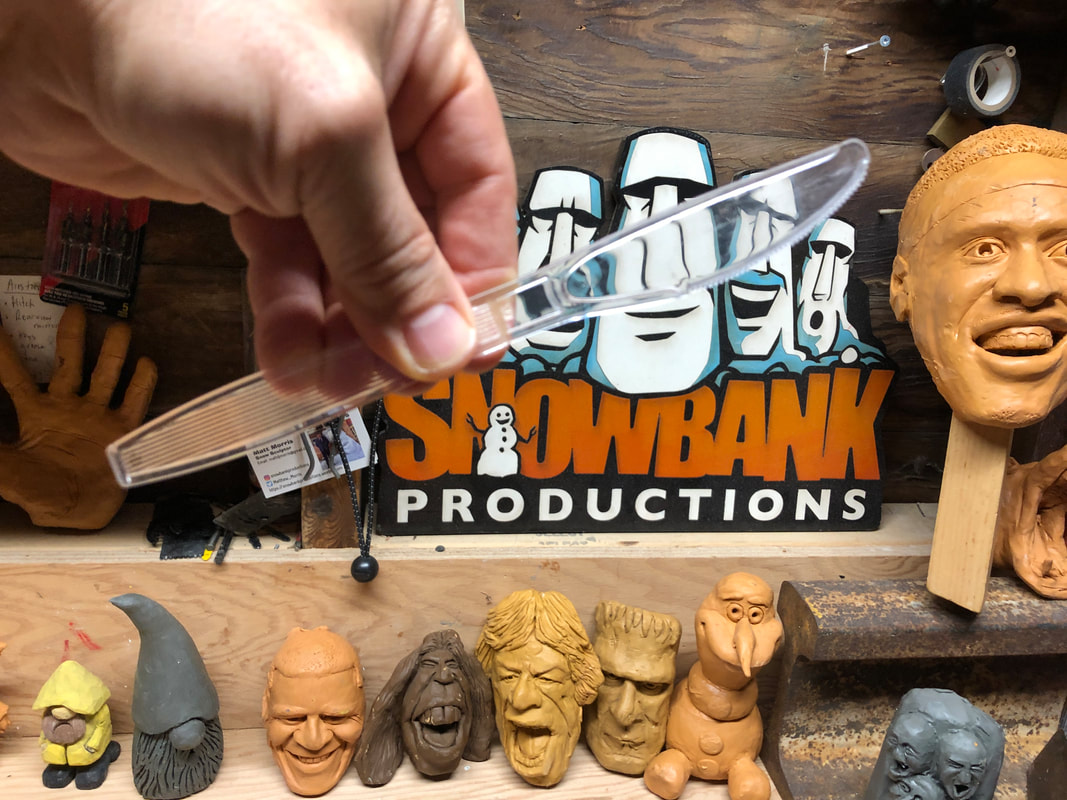
The best start for someone wanting to try snow sculpting is the use of a robust plastic knife.
I say 'robust' because ideally you want a strong plastic knife, not the easily broken ones that sometimes come with fast food.
Parents and Guardians should be involved in tool selection for children.
Supervision of tool use is also a responsibility of parents and Guardians.
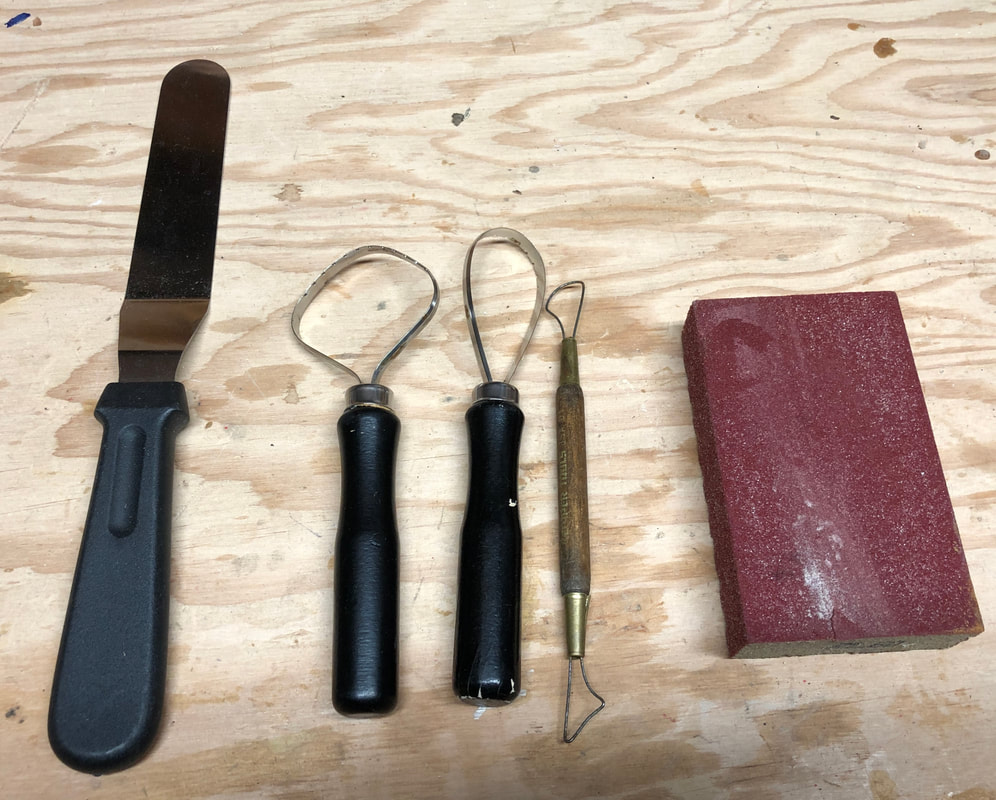
Below is a picture of a robust plastic knife you might choose to use. The second picture highlights some other safe tools including: a cake decorating spatula, three example of loop tools and lastly a simple flexible sanding block.
Many snow sculptors use other tools that can be dangerous. I have chosen not to delve into this collection as safety is my paramount concern for new snow sculptors.
I say 'robust' because ideally you want a strong plastic knife, not the easily broken ones that sometimes come with fast food.
Parents and Guardians should be involved in tool selection for children.
Supervision of tool use is also a responsibility of parents and Guardians.
Below is a picture of a robust plastic knife you might choose to use. The second picture highlights some other safe tools including: a cake decorating spatula, three example of loop tools and lastly a simple flexible sanding block.
Many snow sculptors use other tools that can be dangerous. I have chosen not to delve into this collection as safety is my paramount concern for new snow sculptors.
|
|
More tools!
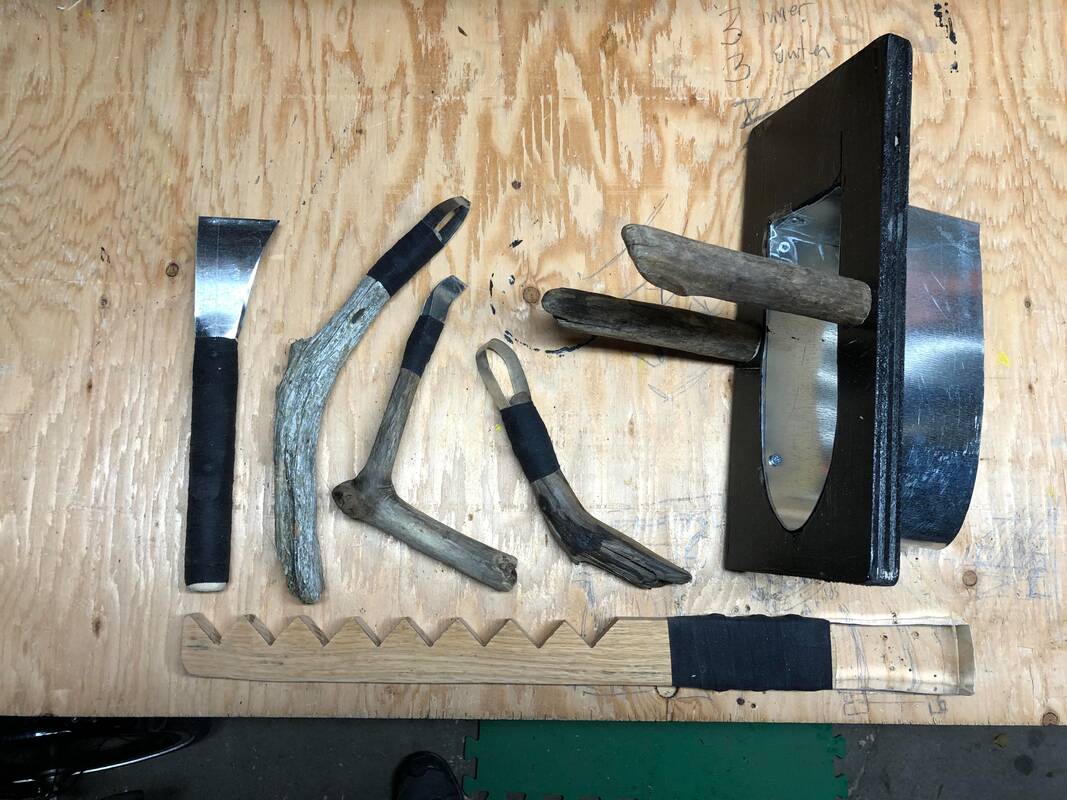
Below are some of the tools I have created for snow sculpting. Sometimes I simply purchase tools but many I enjoy creating.
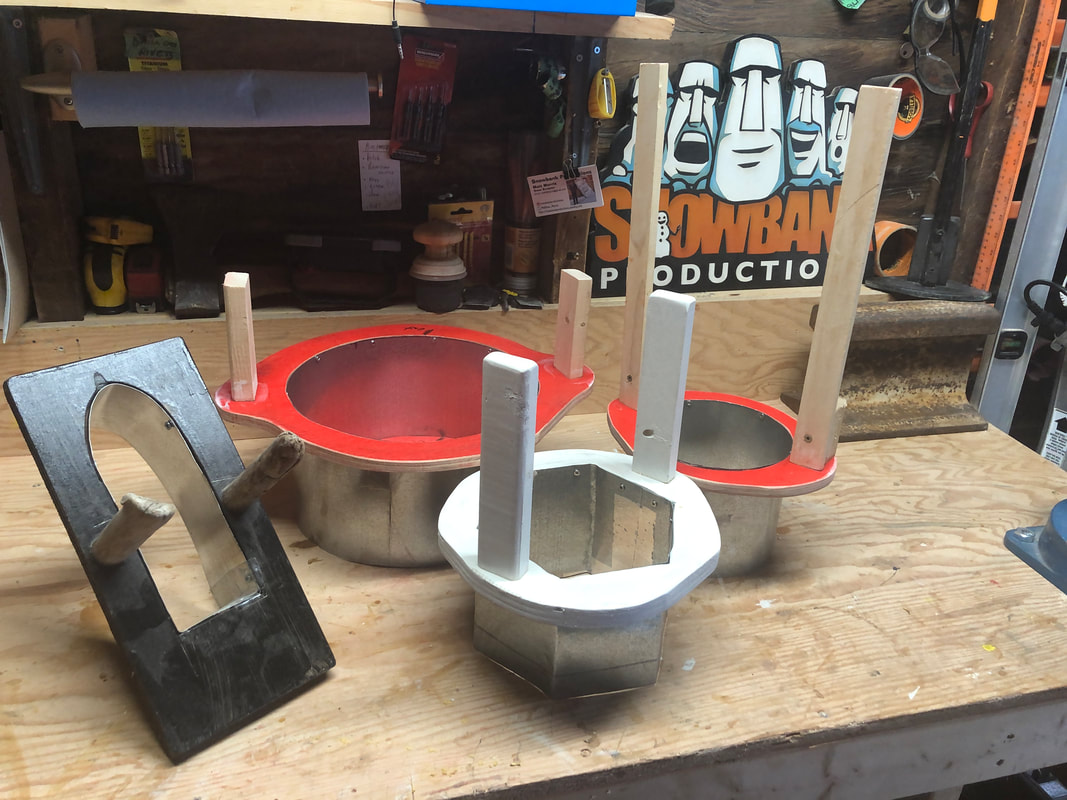
The tool at left is a great for making long slashes in columns of snow. An example would be the creation of the grooves in the bark of a tree stump holding an 8' owl.
At far right in the same picture is the shape (upside down) of an arch for a 'tower of pisa' I carved. This tool is smaller than my original which I decided was too big. It is used like a cookie cutter. I grabbed the two sticks and pushed the cutters into the column of snow. Once the cutter is in place, I scooped out the snow until the shape has been created. Then I removed the cutter. I then had to repeat the process about 100 times! A light shining from inside the column of snow shined through and highlighted the arch.
The weird tool pictured in the bottom is a right angle loop cutter. It’s one of my best tool designs. The wooden handle has weird V grooves because it was a castoff piece from a form build. The gauge of the metal was key. This gauge is heavier than previous tools and holds its shape, even when cutting through hard packed snow. Four screws into the handle keep it together and a wrap with hockey tape makes the grip comfortable.
|
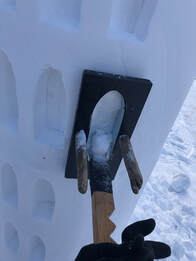
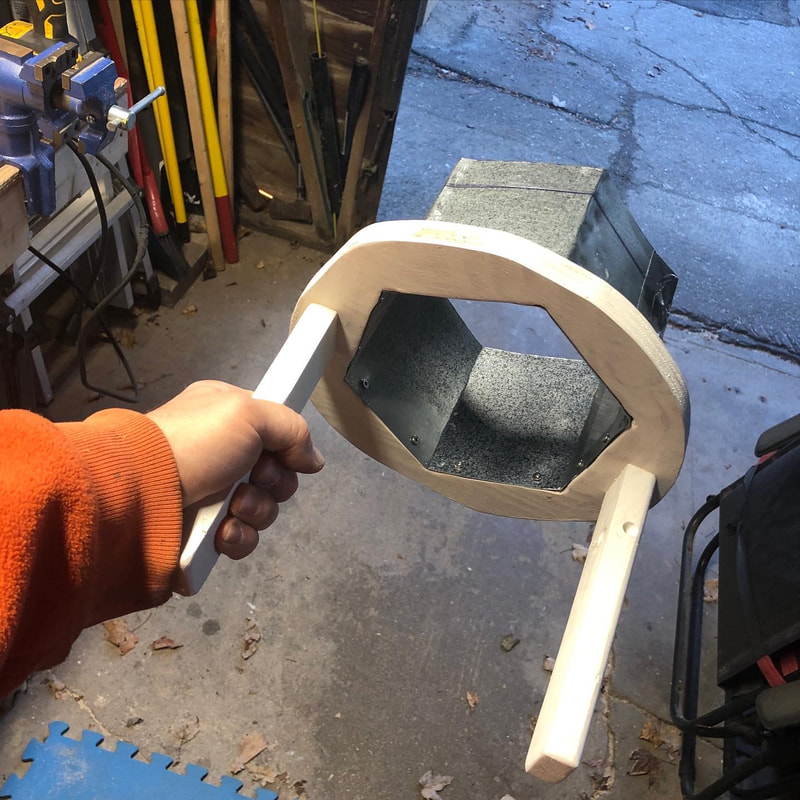
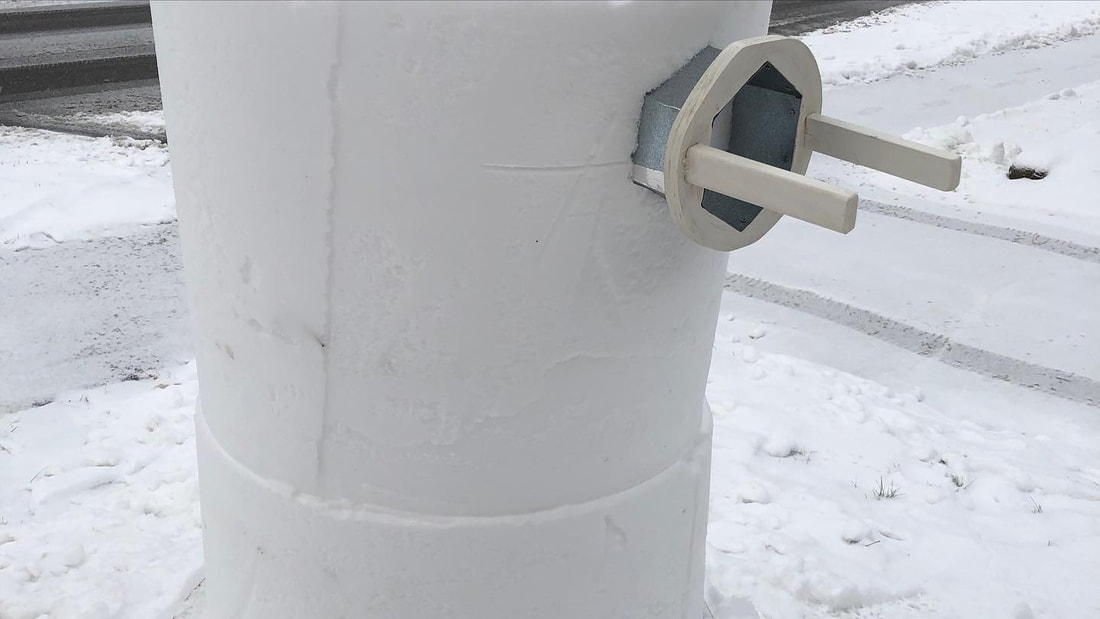
The cookie cutter tool I designed to help me carve the Leaning Tower of Pisa arches. The cutter was pushed into the snow tower and the square loop tool was used to clean out each arch.
|
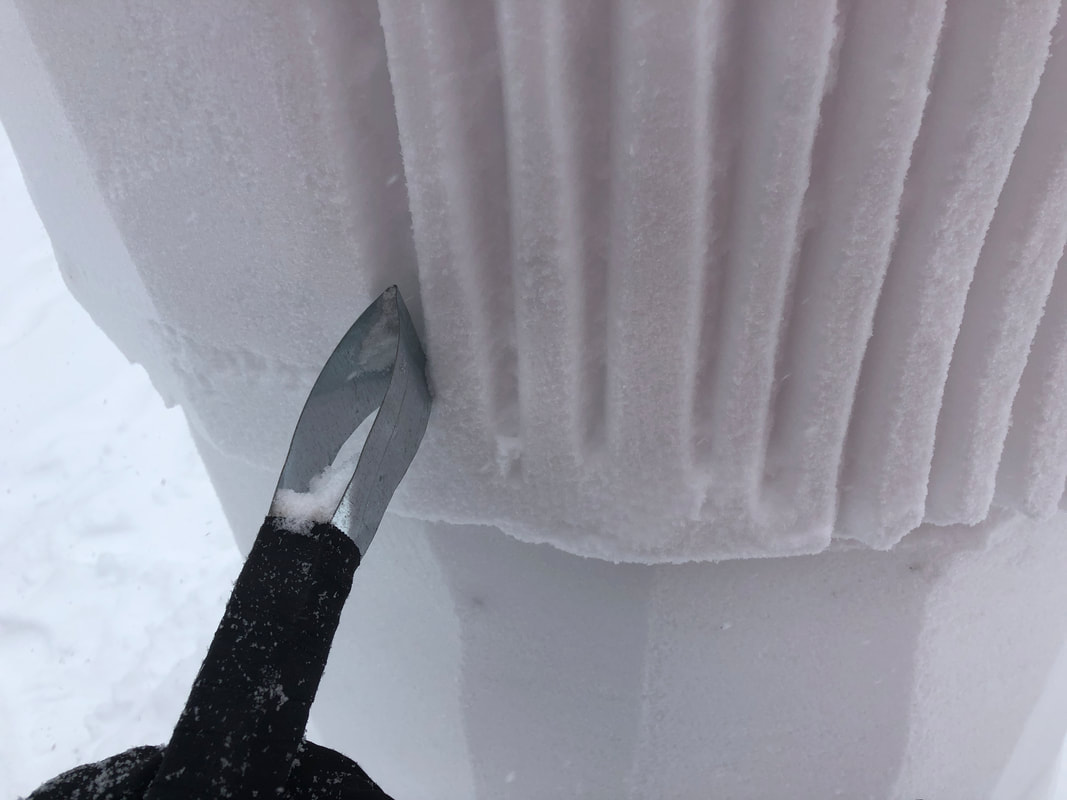
Groves being place into a snow tower. A very effective tool!
|
Cookie cutters
I've called this little section 'cookie cutter' as I believe it to be the best way to describe the new tools I'm getting excited about.
But instead of cutting cookie dough, I push them into the snow sculpture and then scoop out the inside. Check out some of the pictures to get the whole story!
But instead of cutting cookie dough, I push them into the snow sculpture and then scoop out the inside. Check out some of the pictures to get the whole story!
|
Fall of 2021.
The honeycomb cutter was such a hit that I realized I should make more! So I made two circle cutters. And to this group I added an empty tomato can for a third circular option.
Can't wait to try it.
|
Tool experiments
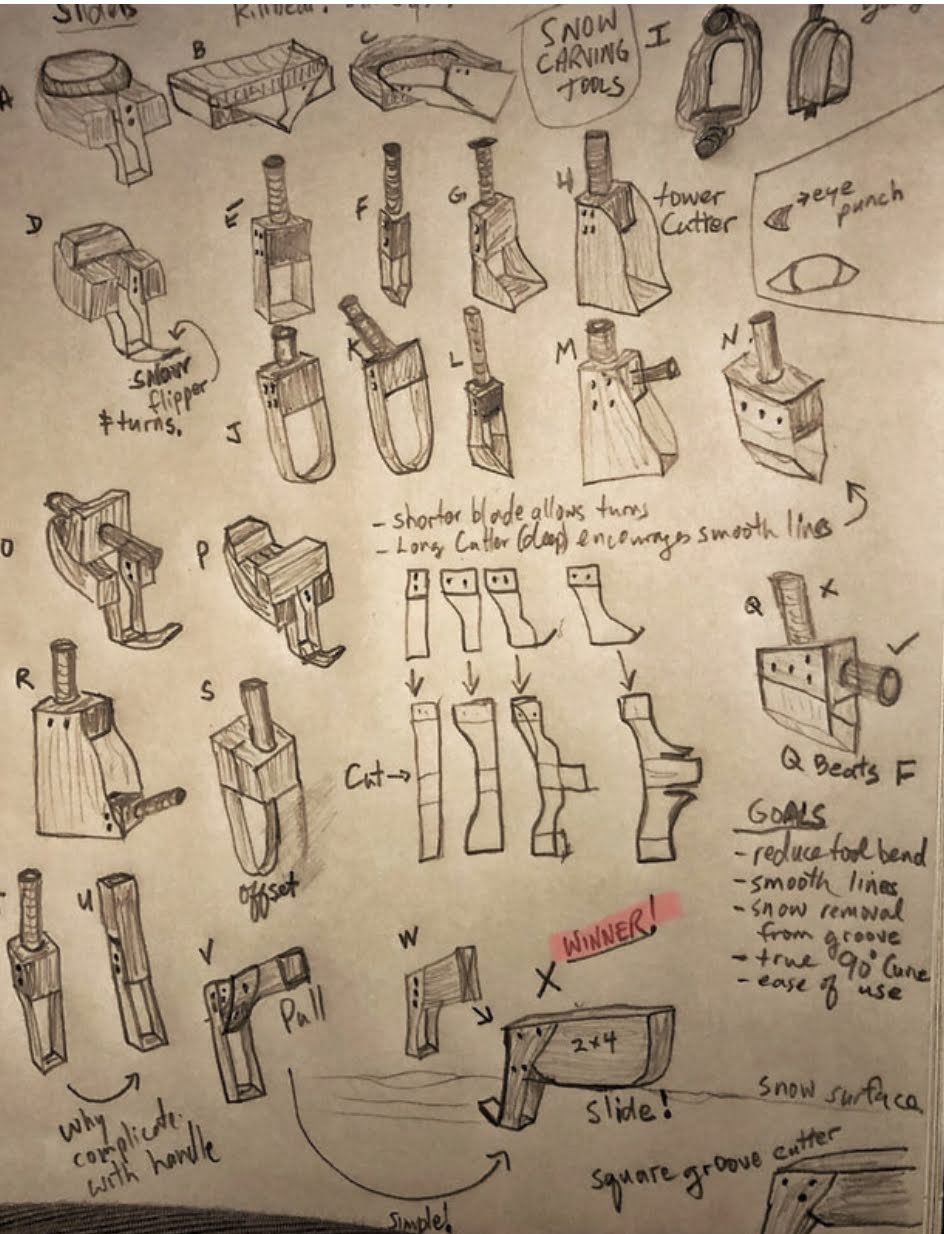
I learned so much from the professional snow sculptors such as (IG) @stijgerart while in Banff in January of 2019. They were very kind to share their vast knowledge of carving....and tools. Special thanks also to my friend @snowsculpt who owns the coolest IG handle and has also shared his vast knowledge of snow sculpting tools. One of the fun aspects of this cheap hobby is the opportunity to create tools. In my new quest to carve cool designs into ‘snow walls’, tool design is an important consideration. How do I cut consistent, smooth and varied style grooves into the walls? Cutting square and V shaped grooves are critical. I should mention that cutting grooves will not be the only way I alter the snow walls. Many other techniques will be used. The grooves however will be key, as part of my plan is to shine a light from behind (at night) and have the different depths of snow allow more or less light penetration. If you review last season, you can see some late winter experiments where I play with lighting. I think the potential for creative expression is large. The pencil drawing picture below shows my thinking about snow carving tools. In the end, I had a breakthrough. The tool at the bottom (highlighted in pink) is simple, easy to make, and most importantly, will hopefully help create a consistent square shaped grooves in the snow wall. Of course a ‘breakthrough’ could end up being a failure. I’m good with failure. It gets me closer to a win. I will continue to bumble along, having fun with my little hobby that’s gets me thinking in new ways and hopefully creating some art that gives people a smile. Time for some snow so I can test out these new ideas!
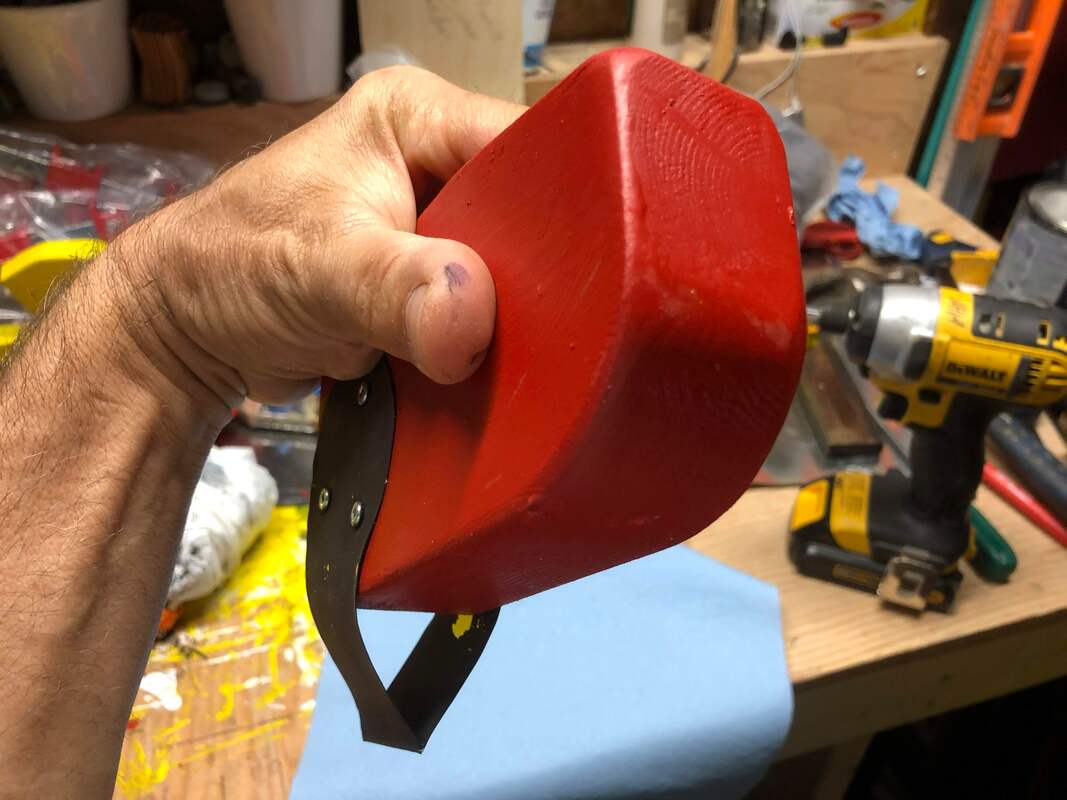
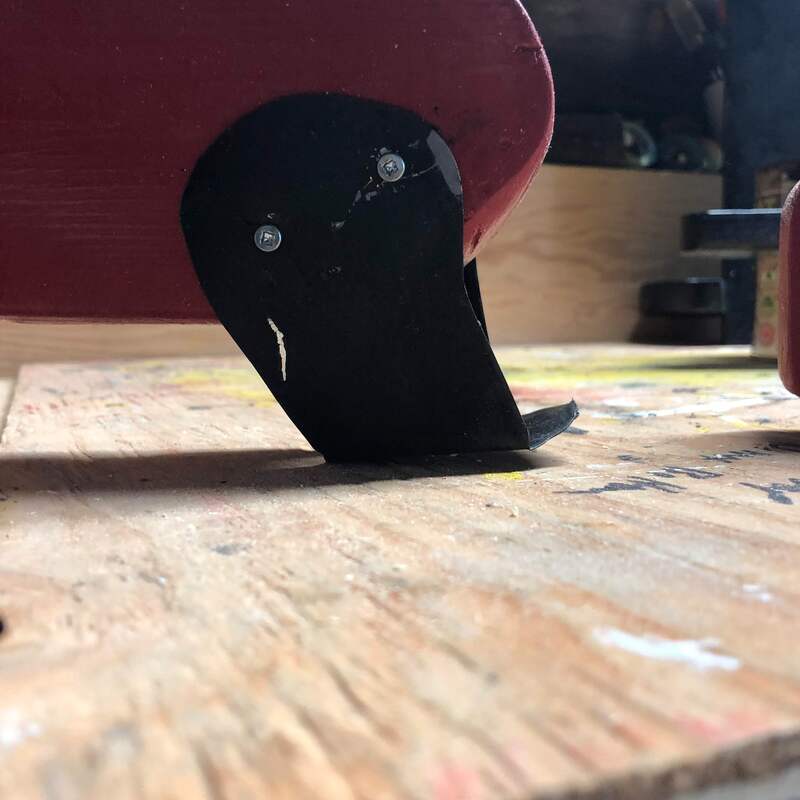
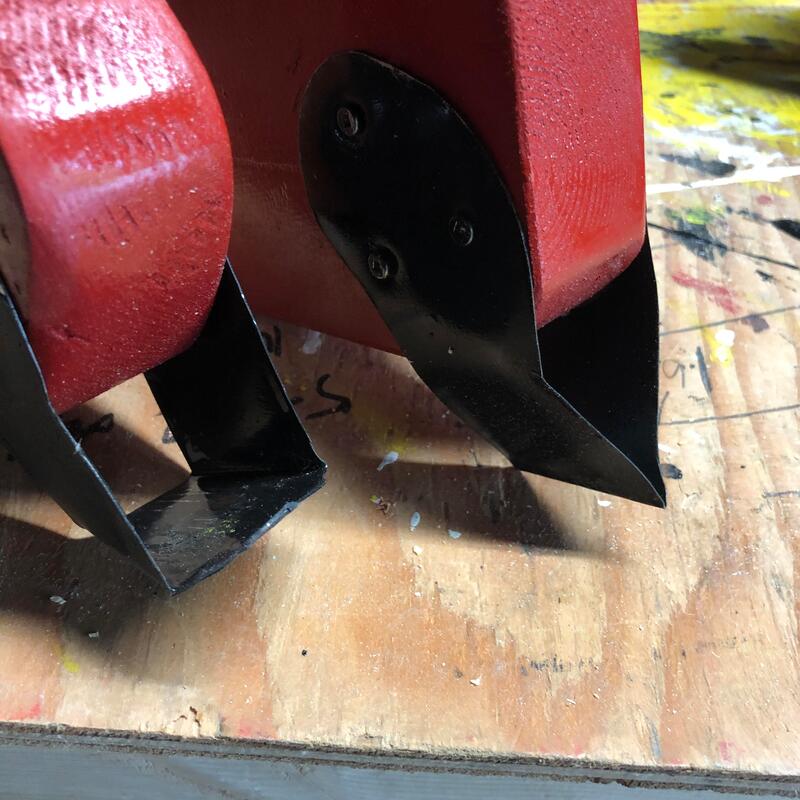
In early September I created my first new tool. A 'V' cutter is shown below in red. The steel was heavier grade and the scrap 2 x 4 I used was raised at the 'heel' where the cutting edge is located. I put a slight angle on the bottom of the cutting edge to lift the snow out of the groove as I slide along. The (red) wood was removed to make a bit of room for the lifting snow. At least that is the theory.
|
|
|
Snow Saw
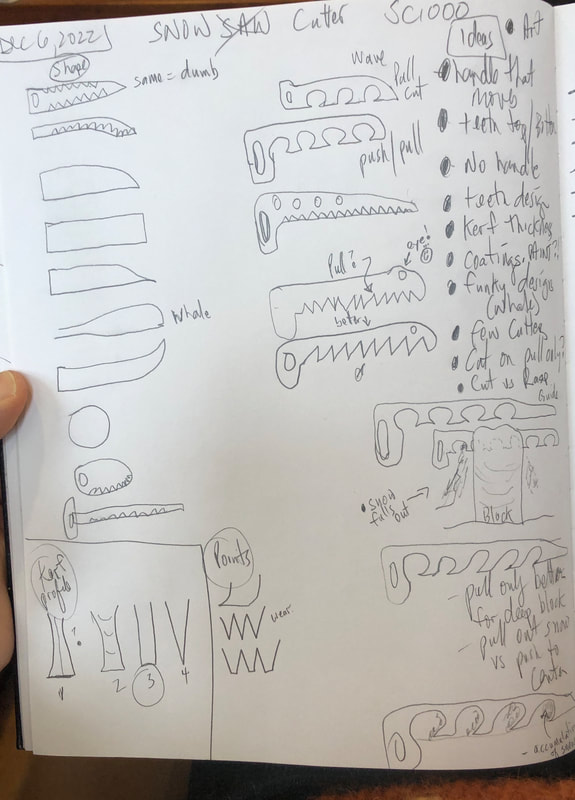
In the fall of 2022 I decided to design a new snow saw. Design thoughts included:
Snow is not wood.
Some snow is soft.
Some snow is almost ice. I once had a snow groomer on a downhill ski hill push me one pile of snow. It was almost like rock.
I might want to travel with the saw--length and weight are factors. My written notes are included below.
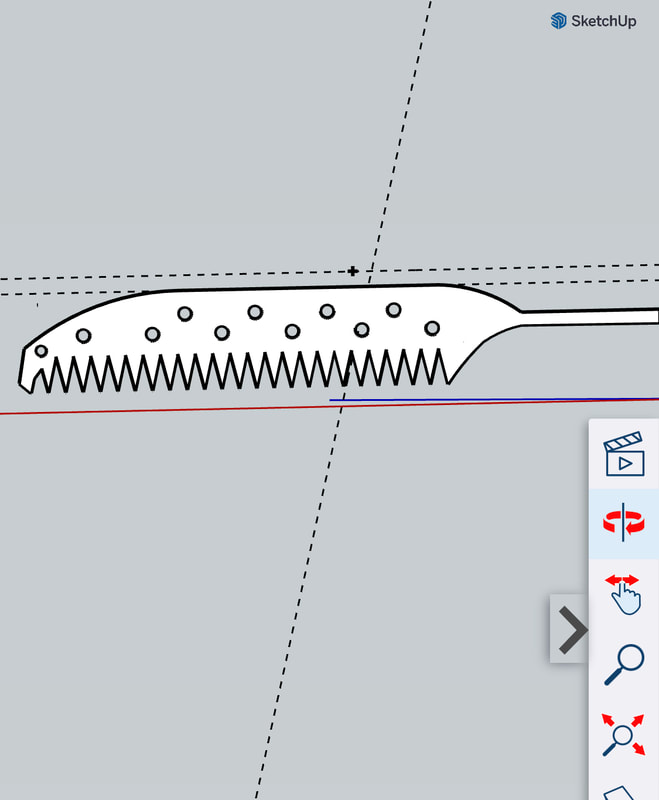
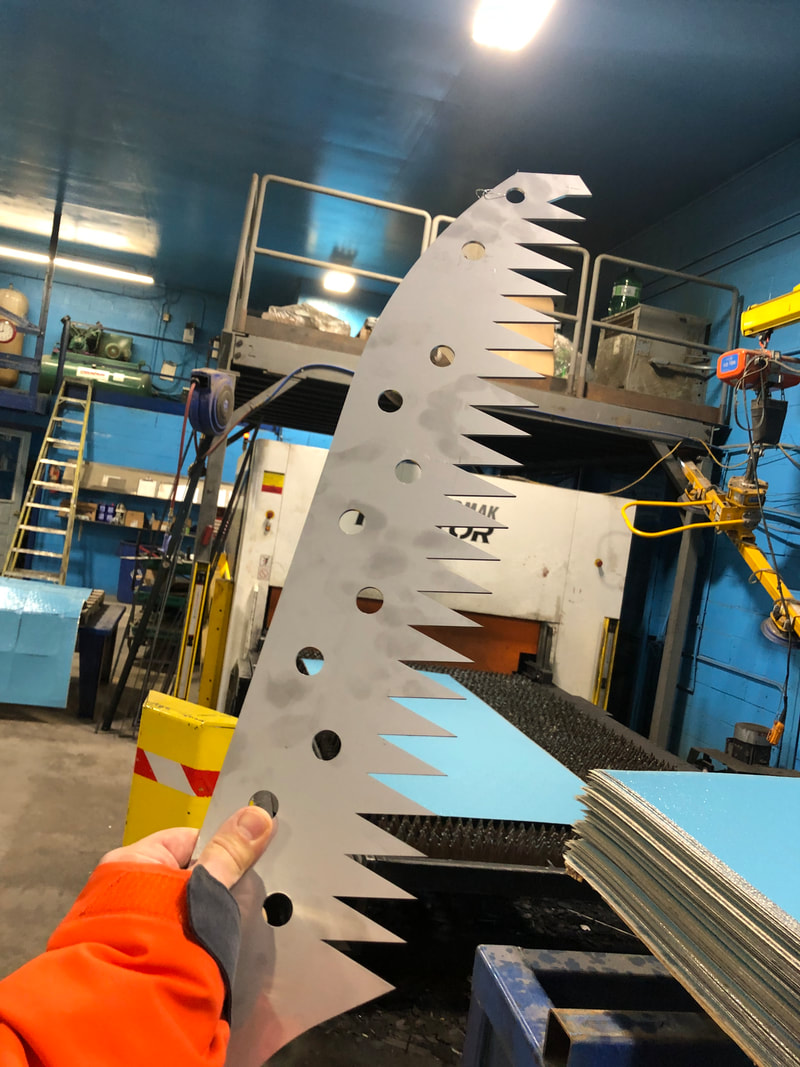
So I proceeded in my investigations and ended up making a saw in SketchUp.
I then had it laser cut on a farm in Linwood. Special thanks to Ament Group specialist Paul Sargent for fixing my SketchUp file and for Michael J Nedell for converting my file!
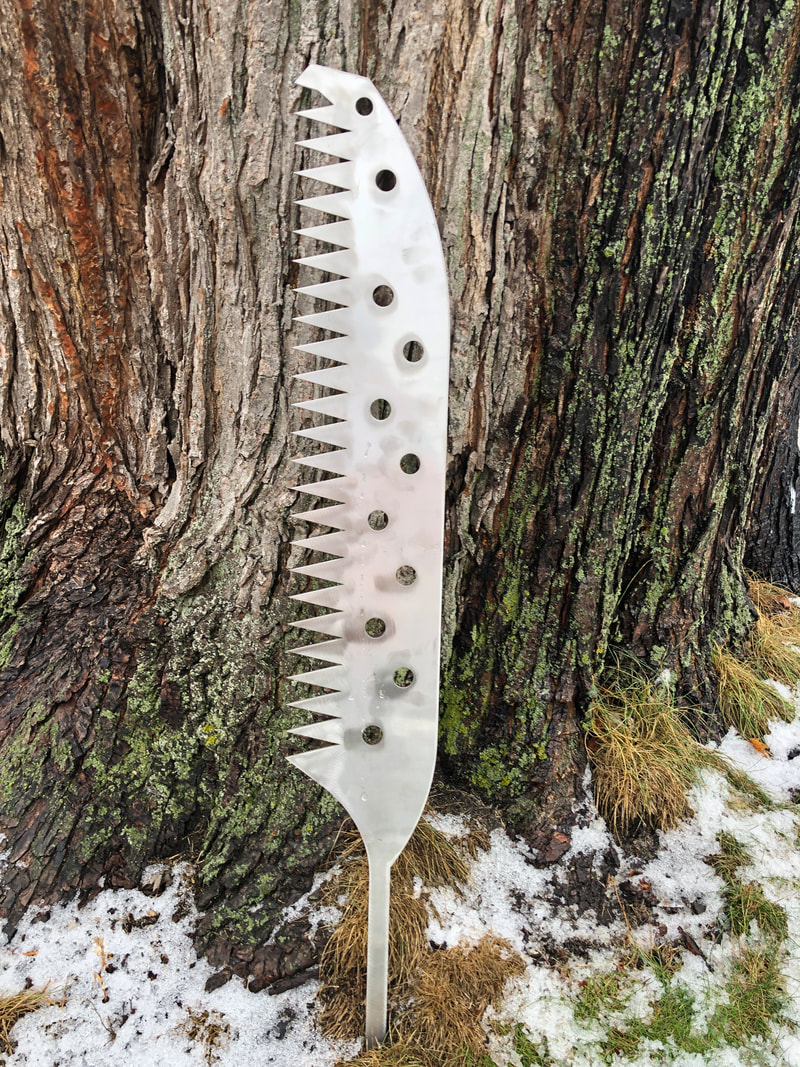
I used 3mm stainless steel and it came out at around 4lbs.
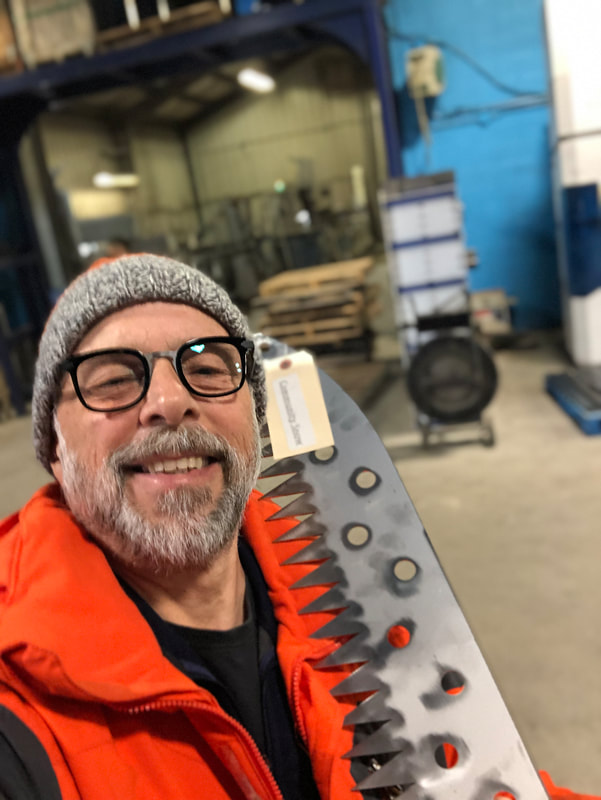
I used it first on December 26, 2022 and it was extremely effective.
Also heavy. It also needs a handle to envelop the tang. The tang is the thin piece of steel that sticks out the back.
I've learned so much through this test:
3mm is too thick. Unnecessary weight.
1.5mm might be better. I should handle potential stock to help me make this decision.
The holes I had included reduce weight and also end up doing some cutting.
Tempering the tip issues.
Teeth orientation. I'm reading a lot about old crosscut saws and cutting vs dragging along with offset issues.
The handle adds length which is counterproductive. A more traditional saw handle would reduce the length.
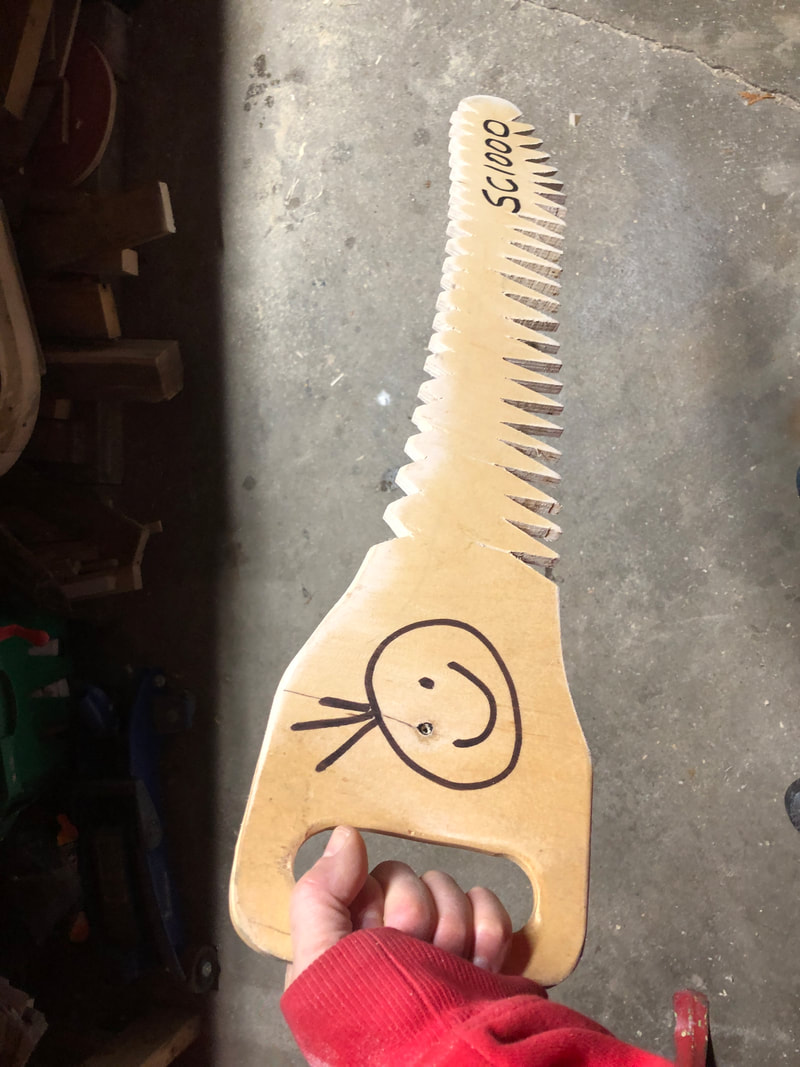
And for softer snow, is there an opportunity to just make it out of wood?! Check out the last picture! lol
I'm always open to your input too!
Snow is not wood.
Some snow is soft.
Some snow is almost ice. I once had a snow groomer on a downhill ski hill push me one pile of snow. It was almost like rock.
I might want to travel with the saw--length and weight are factors. My written notes are included below.
So I proceeded in my investigations and ended up making a saw in SketchUp.
I then had it laser cut on a farm in Linwood. Special thanks to Ament Group specialist Paul Sargent for fixing my SketchUp file and for Michael J Nedell for converting my file!
I used 3mm stainless steel and it came out at around 4lbs.
I used it first on December 26, 2022 and it was extremely effective.
Also heavy. It also needs a handle to envelop the tang. The tang is the thin piece of steel that sticks out the back.
I've learned so much through this test:
3mm is too thick. Unnecessary weight.
1.5mm might be better. I should handle potential stock to help me make this decision.
The holes I had included reduce weight and also end up doing some cutting.
Tempering the tip issues.
Teeth orientation. I'm reading a lot about old crosscut saws and cutting vs dragging along with offset issues.
The handle adds length which is counterproductive. A more traditional saw handle would reduce the length.
And for softer snow, is there an opportunity to just make it out of wood?! Check out the last picture! lol
I'm always open to your input too!
|
|
|
|
|
|
|
