Eyeballs
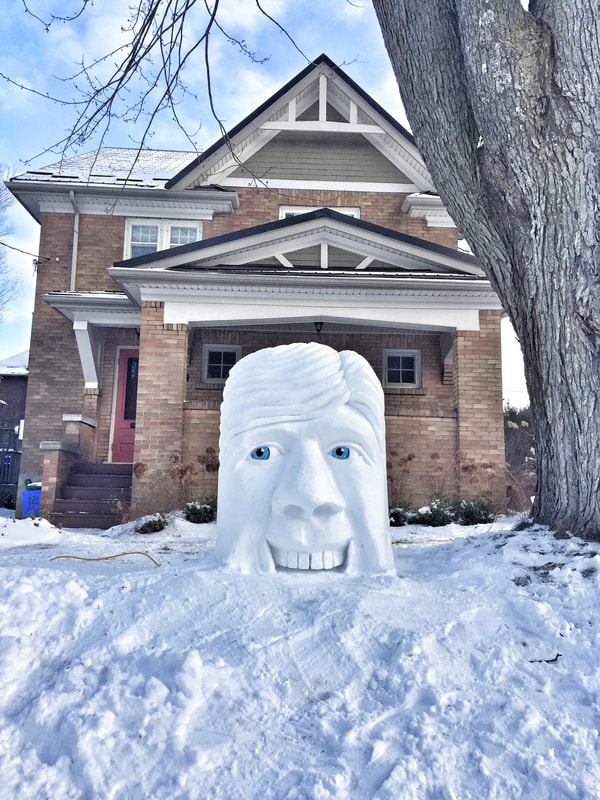
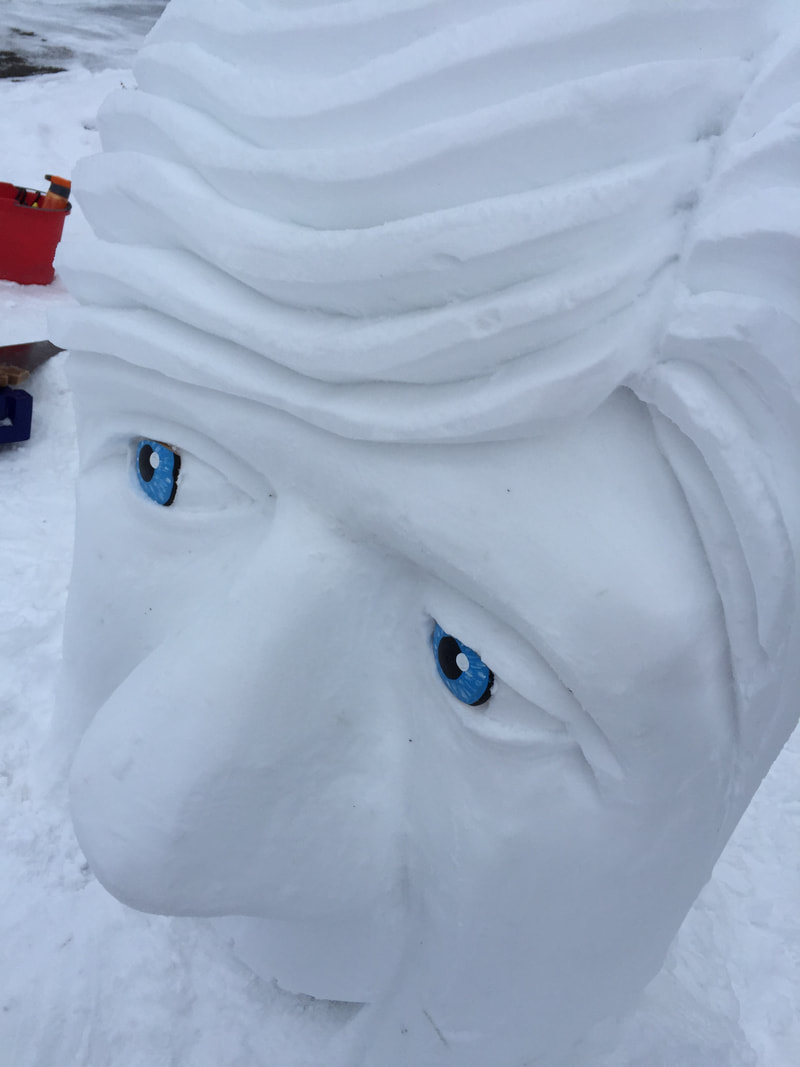
Eyeballs bring the snow sculptures to life.
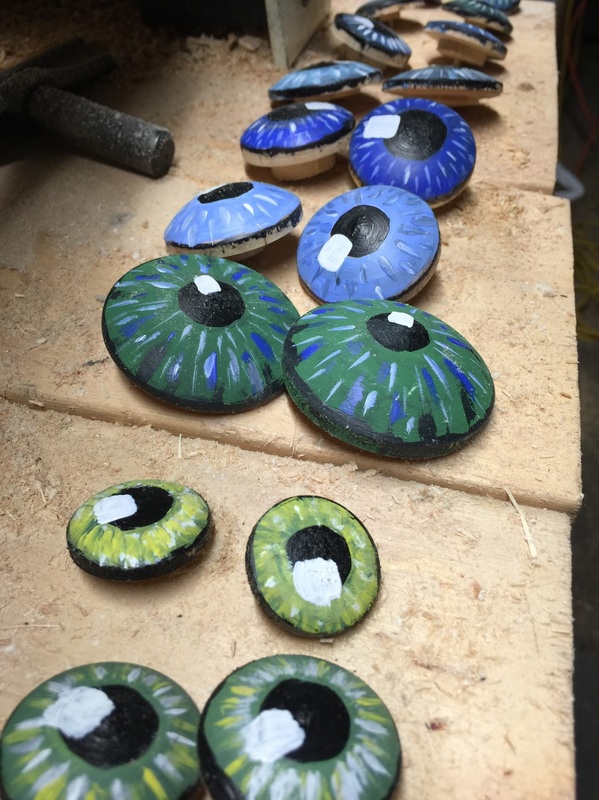
They are turned from scraps of wood on my lathe. Usually from a birch log.
Then I paint them. Up close, they don't look like much, but stand back 15 feet or more and they look ok!
And to be accurate, I actually do not create eyeballs. I create the iris only. I also glue a little stick on the back that acts as an anchor. Otherwise they fall out and my grandson has to dig around finding them. He used to get very excited when he found one. "Grampy! I found an eye!!". Since I have started this new approach, my grandson is out of a job.
Fortunately, he loves to carve.
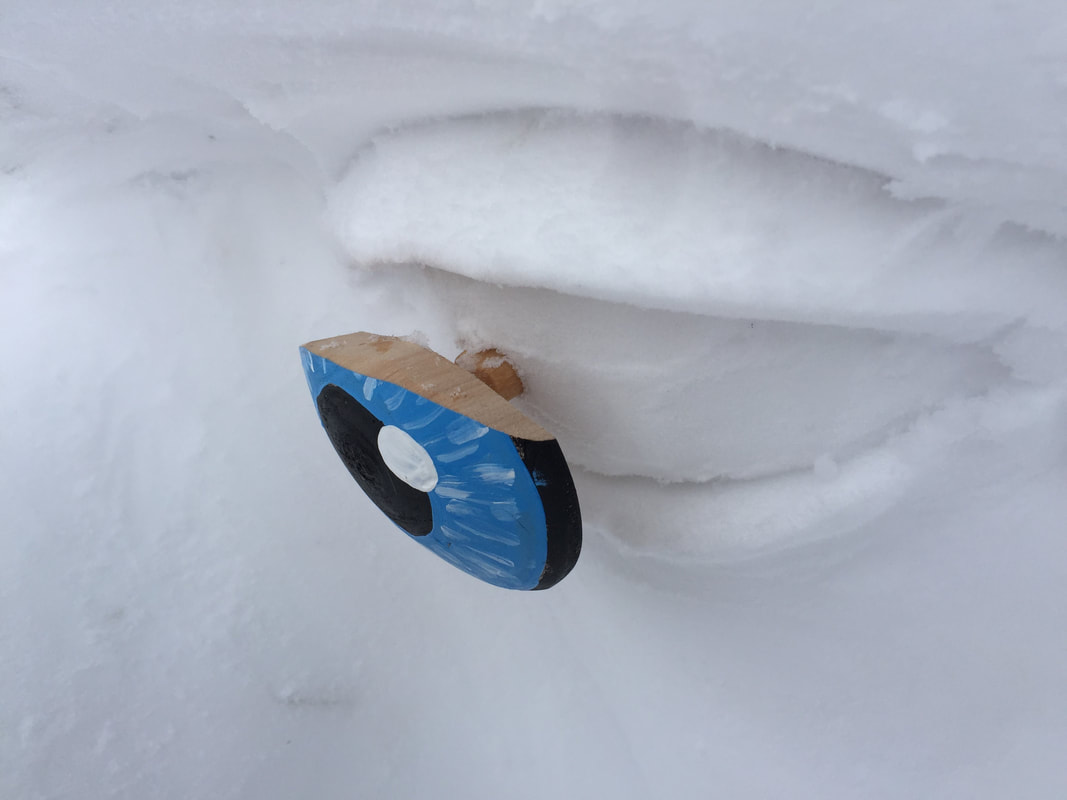
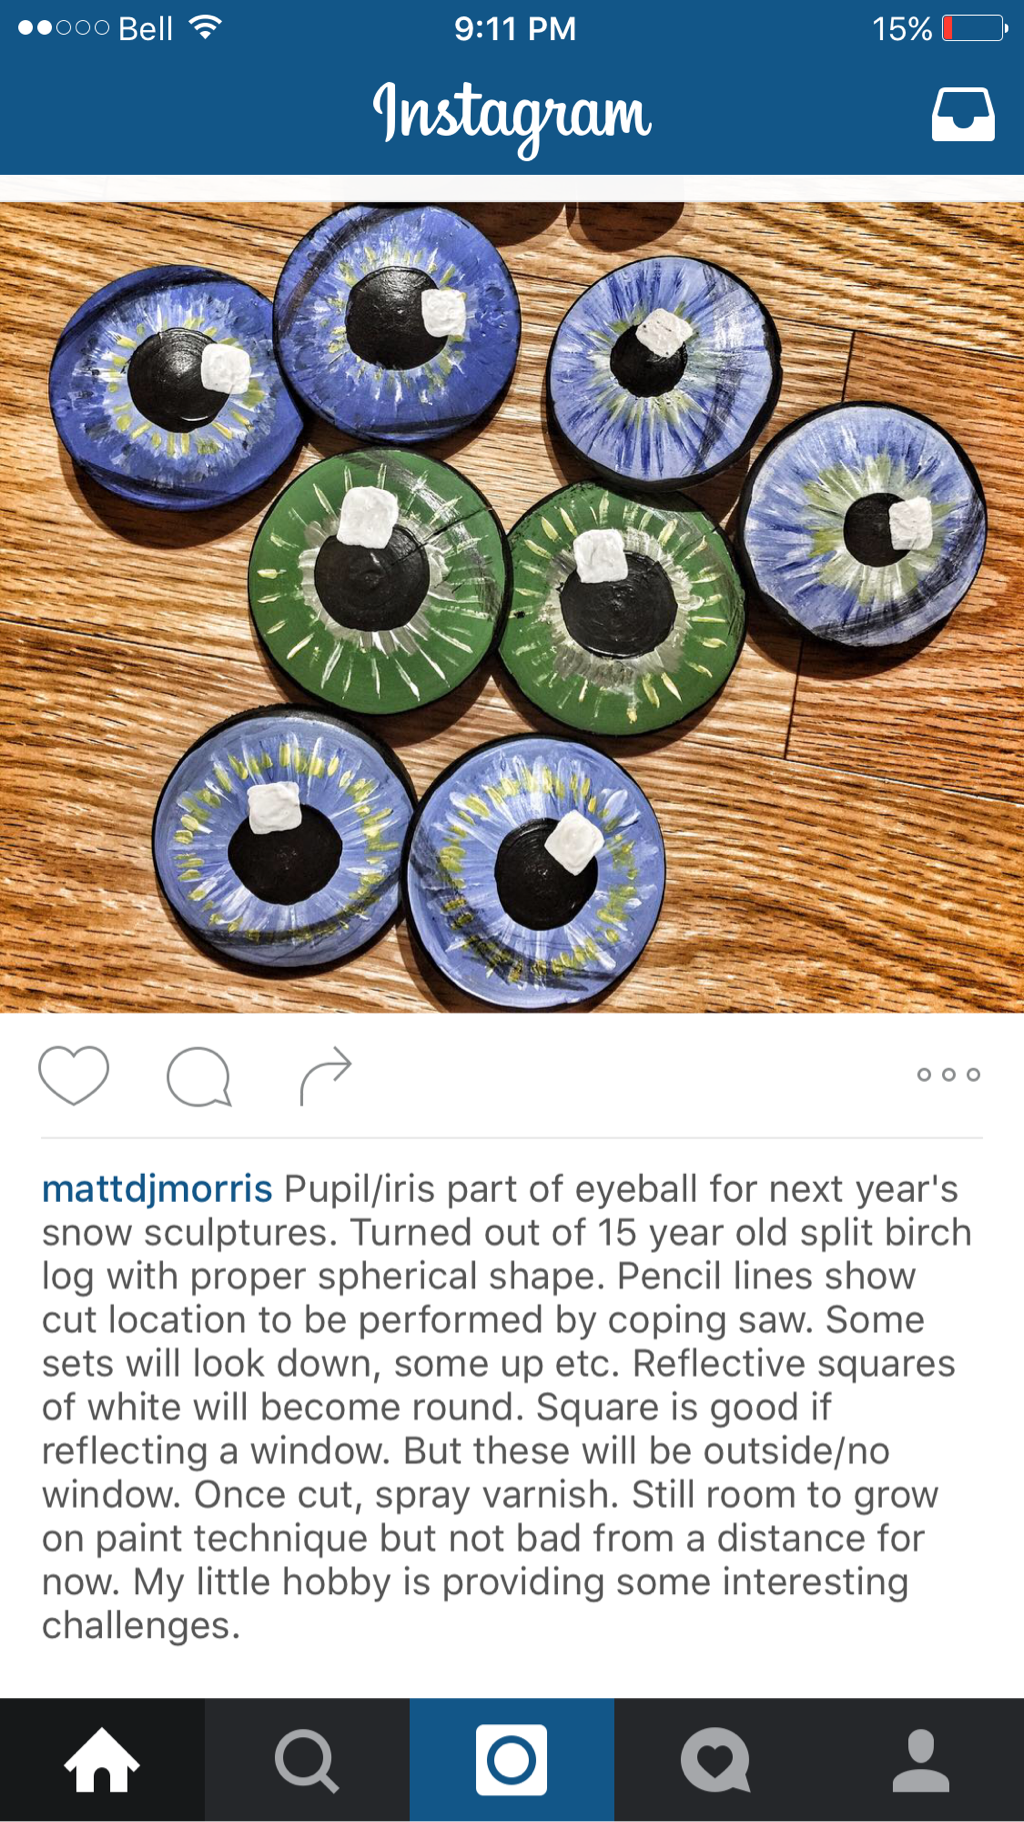
I pick an iris that will work with the sculpture then I cut the eye area on the sculpture. Next, I line up where the iris will be placed and note the location of the stick on the back of the iris. Next, I drill out a hole for this support pin.
|
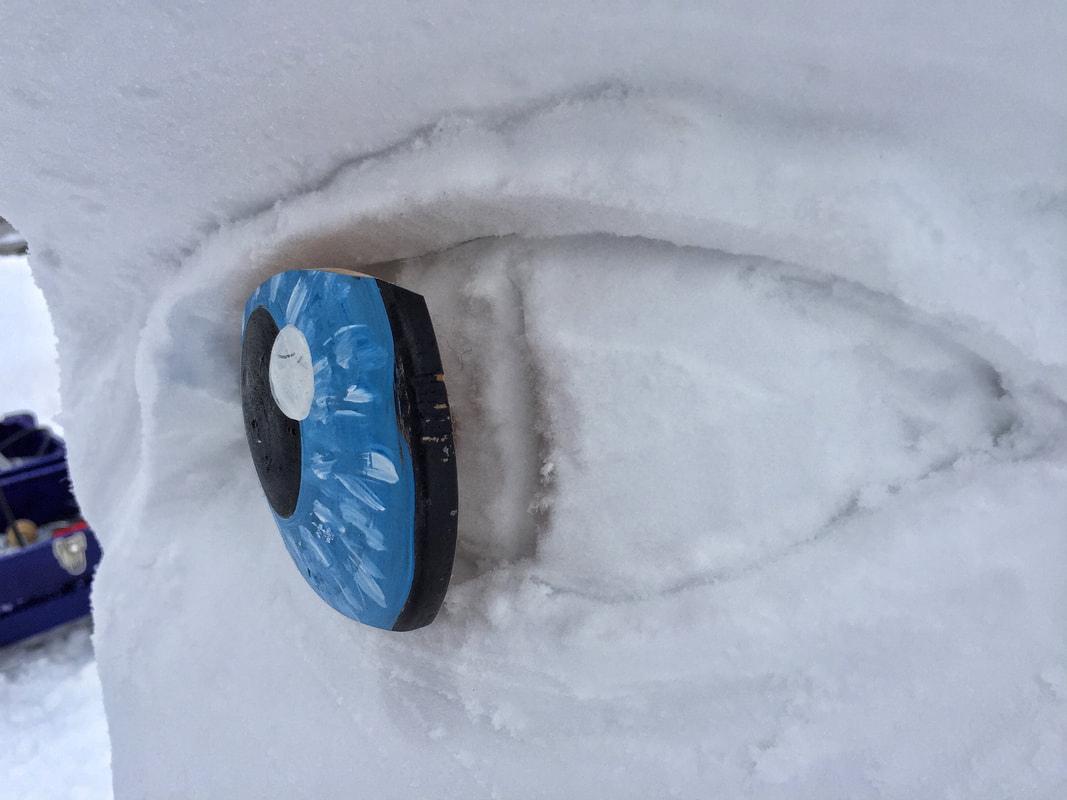
Here I am about to insert the iris. Note that not only did I drill a hole for the anchor but I also removed an area of snow so that the iris could slot into the opening. The result would be an iris flush with the white of the eyeball.
|
|
|
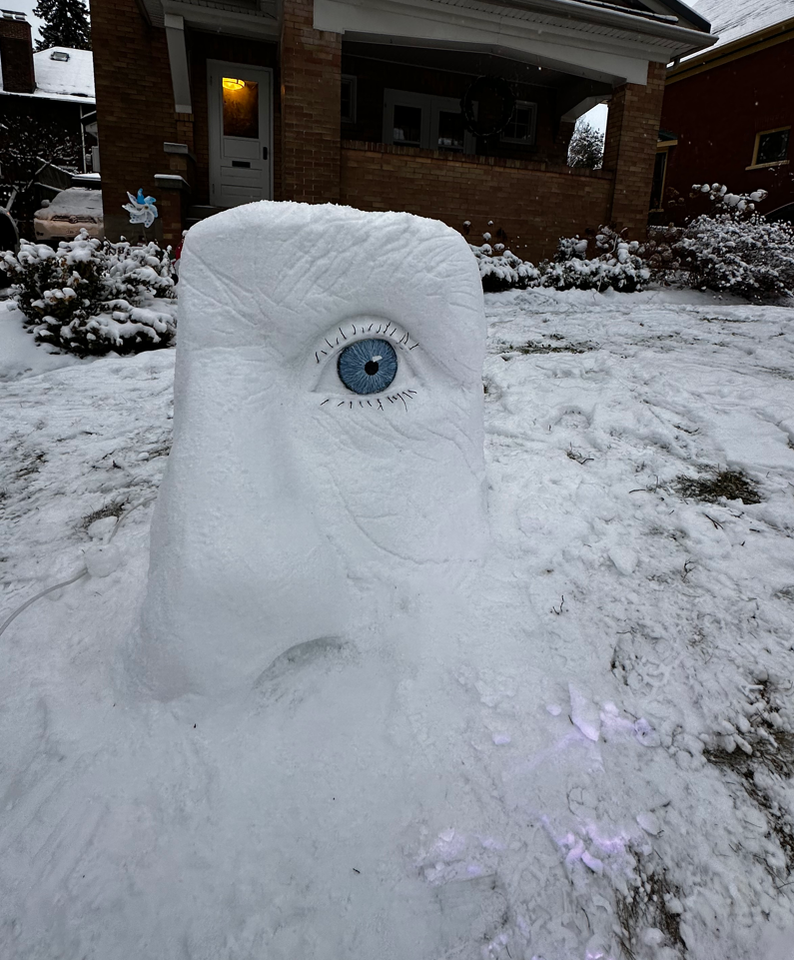
I bought an 18" piece of maple that was about 1 1/2" x 1 1/2" and turned a bunch of spinning tops for Christmas. Then I started making a few iris' for an upcoming project. I needed some smaller eyes.
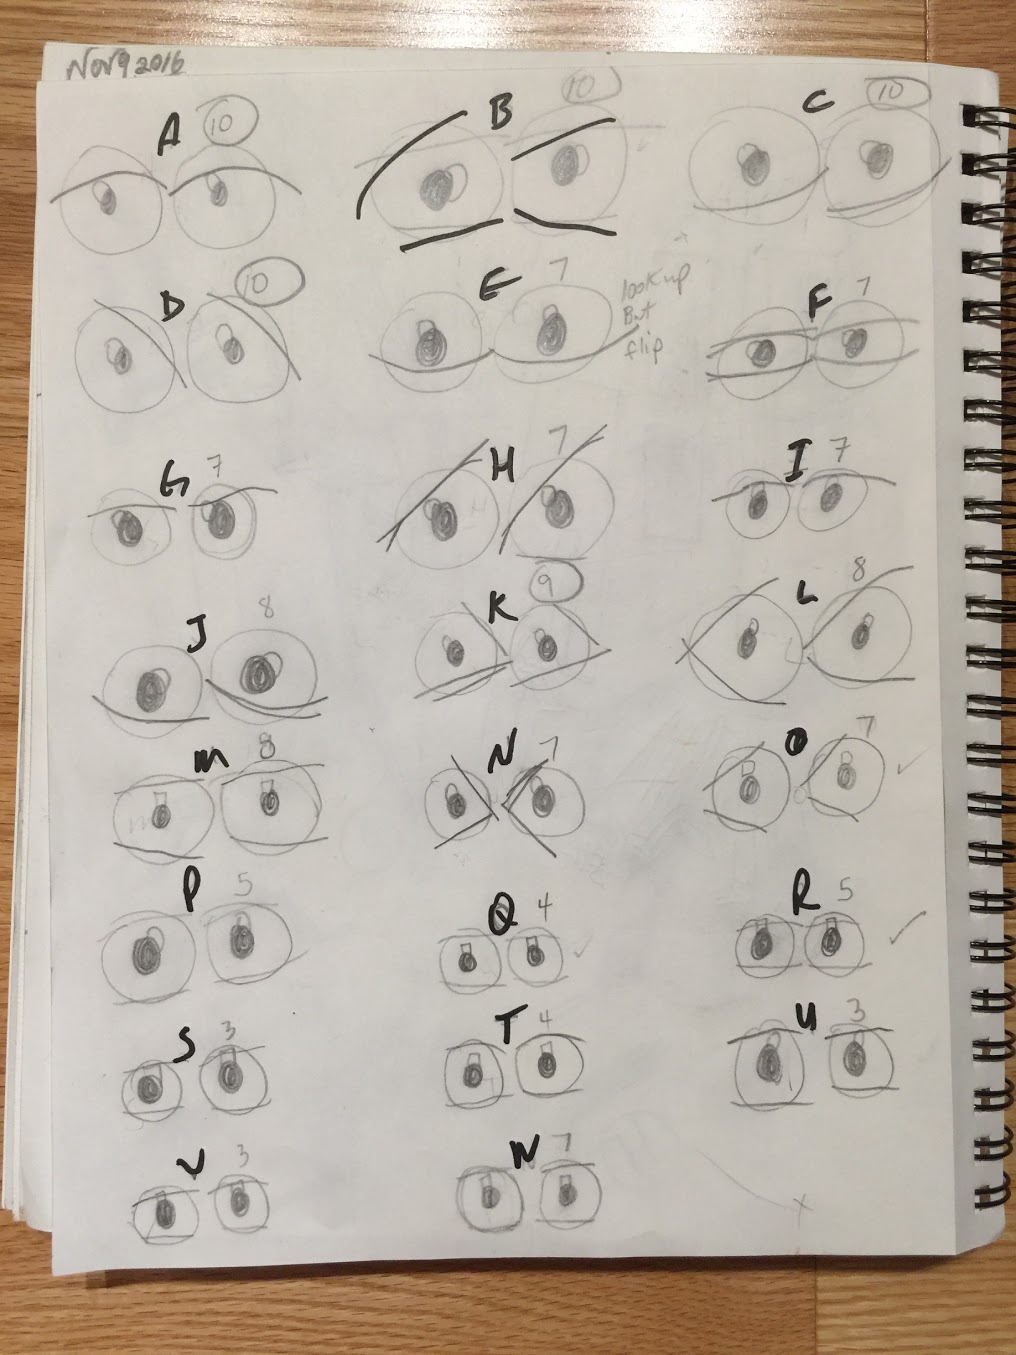
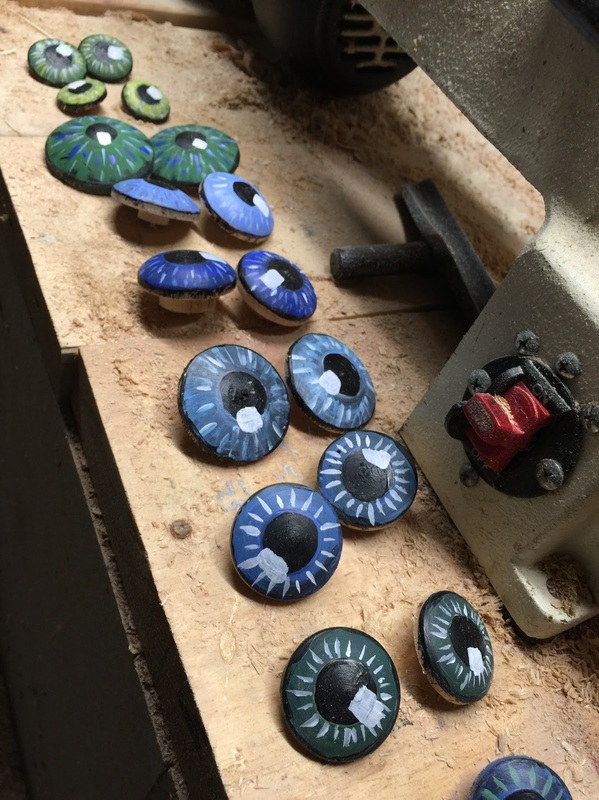
Here is the whole process to make an iris: 1. Spin wood on lathe including sanding. Wear full face protection for maximum safety. If you care about hearing people when you are old, also wear ear protection. And protection from dust so that you don't mess with your lungs! 2. Paint as best you can. I look forward to improving my skills here. 3. Cover the result 2 part expoxy to give them shine. Update: as of January, 2020, I have discovered a little bottle of liquid called ModPodge. I buy it at Michaels using my 45% off coupon and it does a great job of giving each iris a clear glossy look. 4. Glue on a little stick using construction adhesive. This stops the iris' from falling out of the snow sculpture. 5. Grind off the part of the iris that will be hidden behind the (snow) eyelid using a disk sander or other technique. |
|
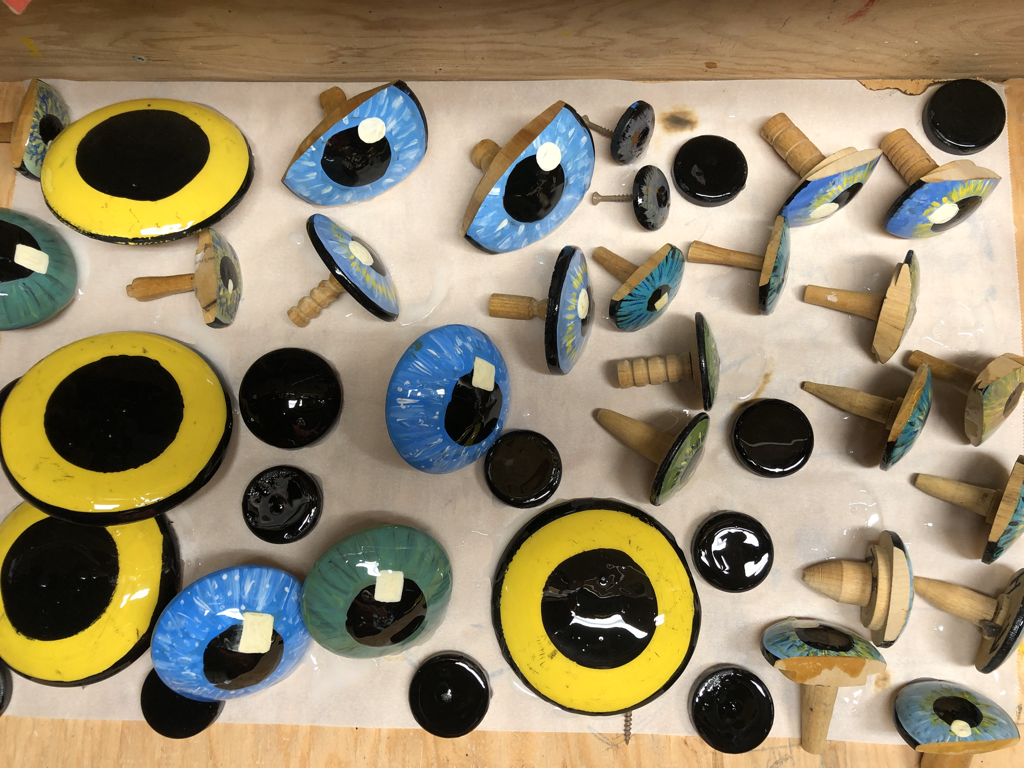
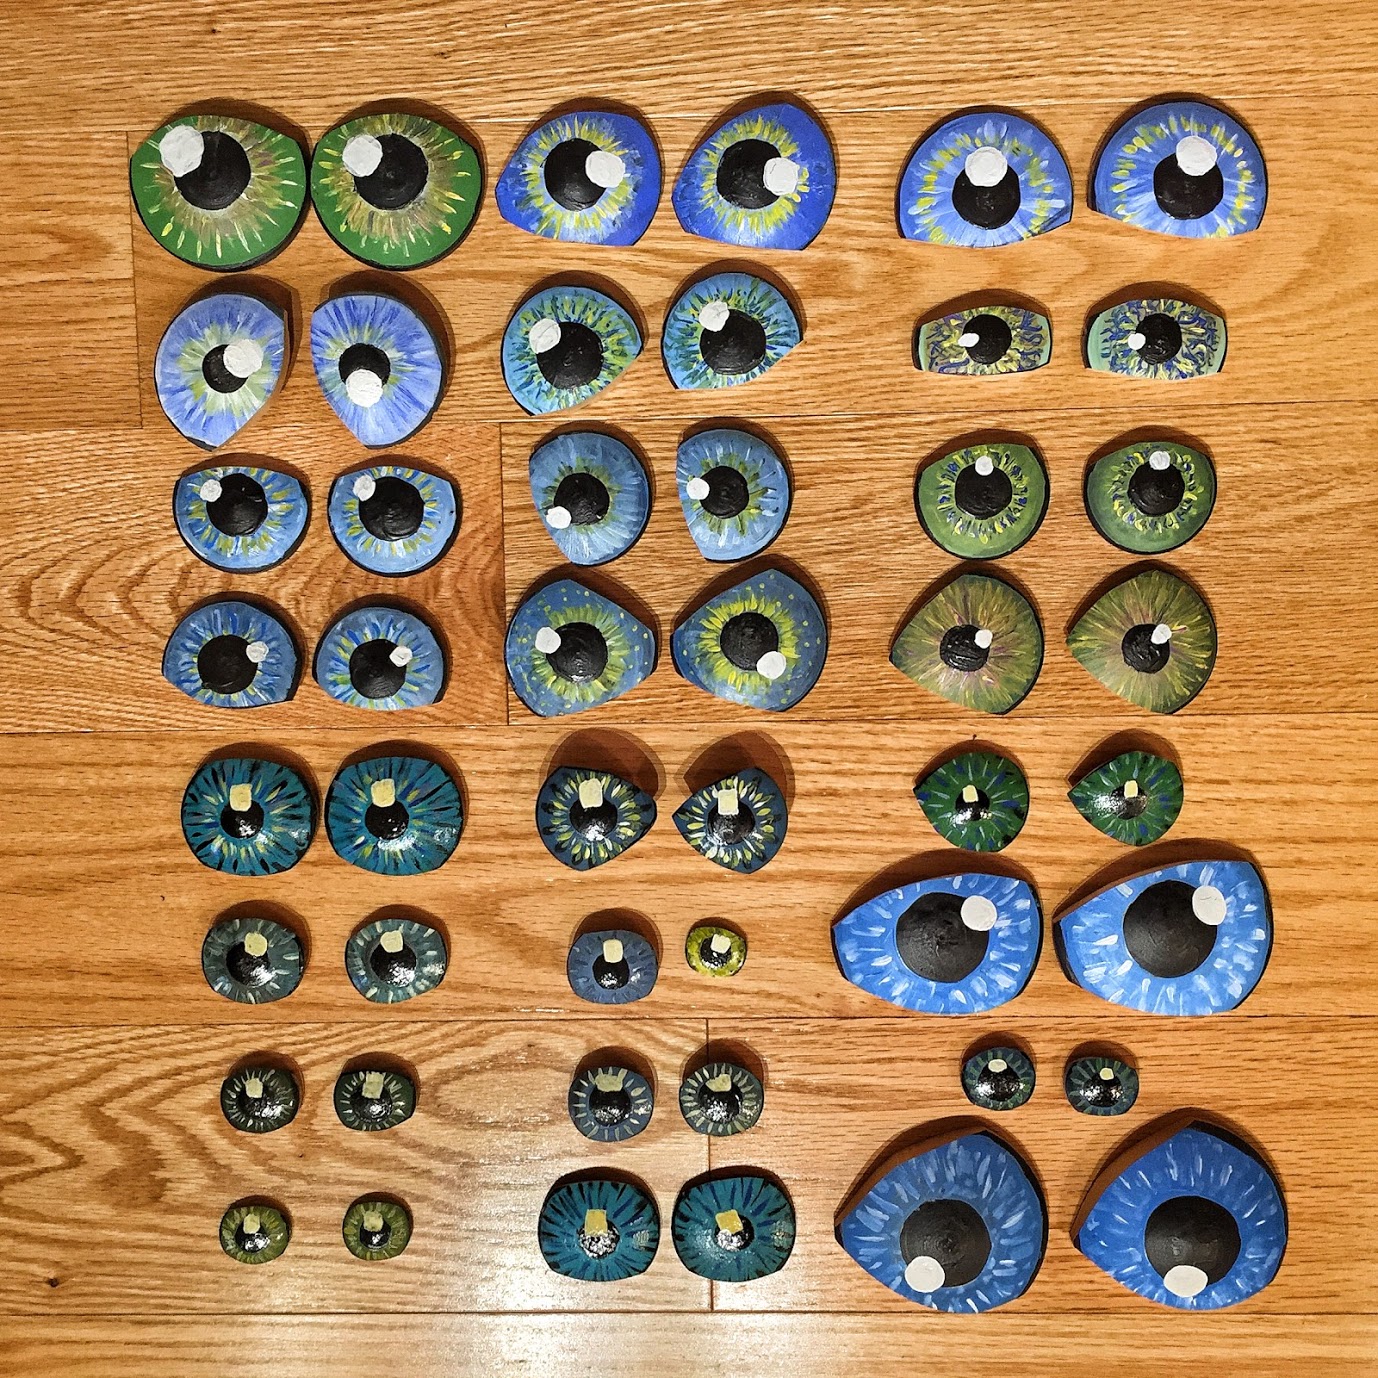
Pouring 2 part epoxy on some of the eyes gives them a really glossy look. The big yellow and black eyes shown here are used when I make an 8' tall owl. I glue little sticks on the back. This ensures that the eyes don't fall out!
|
|
The group above is ready to go as of November 2016. I sanded them on a friend's disk sander. They are sanded so that various 'looks' can be realized. If you are not quite sure why the heck I am sanding off part of the iris, walk over to a mirror. Stare at yourself with your eyes wide open. Now squint. Note how the amount of iris in view decreases incredibly.
|
|
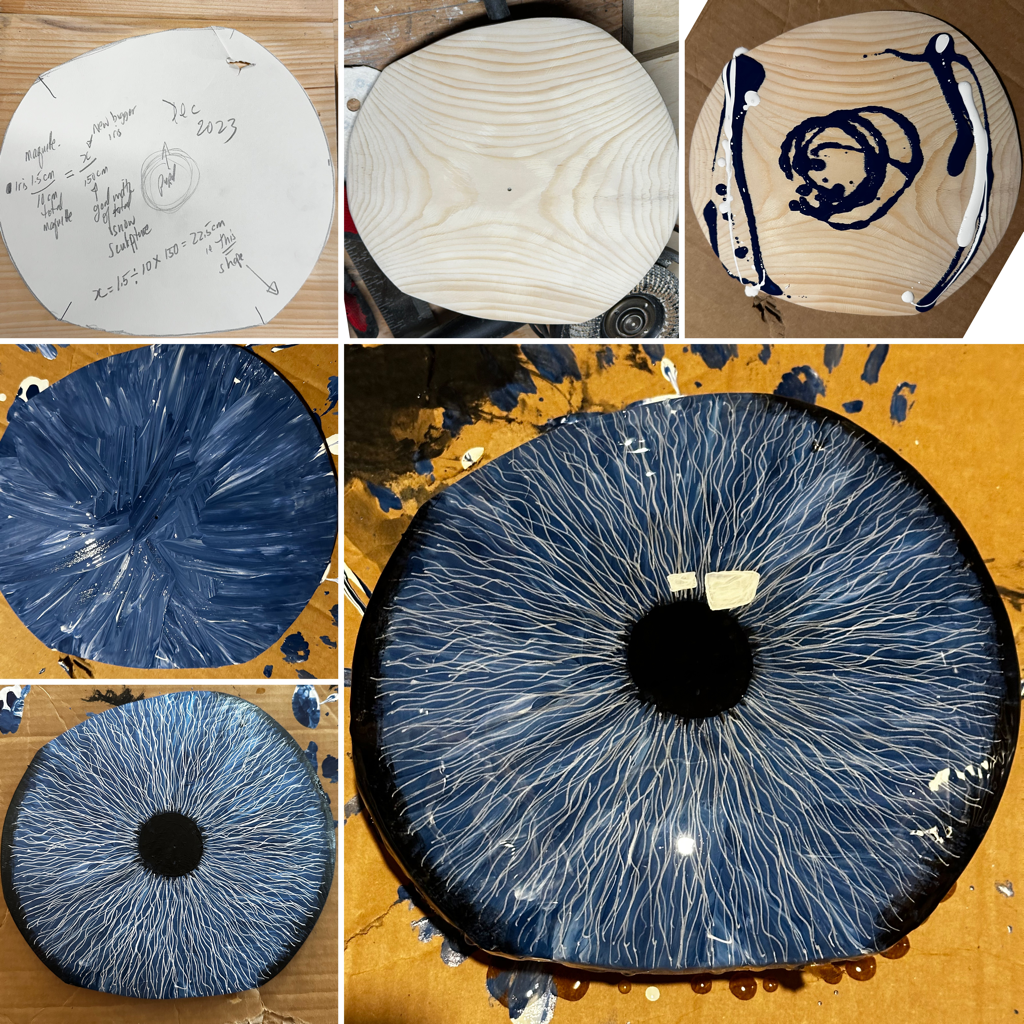
New Irises. December, 2023.
I decided to make a large iris.
I found a piece of 2 x 10 and cut it roughly into a circle. I then used a grinder with a special wood grinding attachment to carve it down to the appropriate sphere. After a good sanding with an orbital sander I painted it with a mixture of blue and white paint for a base. Once dry I painted the black pupil and then proceeded to use a paint pen to draw the white lines. I also painted a light black around the edge. Once dry I painted a reflection on the iris and let it dry again. Once finally dry I applied a clear two coat epoxy to give it a shine.
I found a piece of 2 x 10 and cut it roughly into a circle. I then used a grinder with a special wood grinding attachment to carve it down to the appropriate sphere. After a good sanding with an orbital sander I painted it with a mixture of blue and white paint for a base. Once dry I painted the black pupil and then proceeded to use a paint pen to draw the white lines. I also painted a light black around the edge. Once dry I painted a reflection on the iris and let it dry again. Once finally dry I applied a clear two coat epoxy to give it a shine.
|
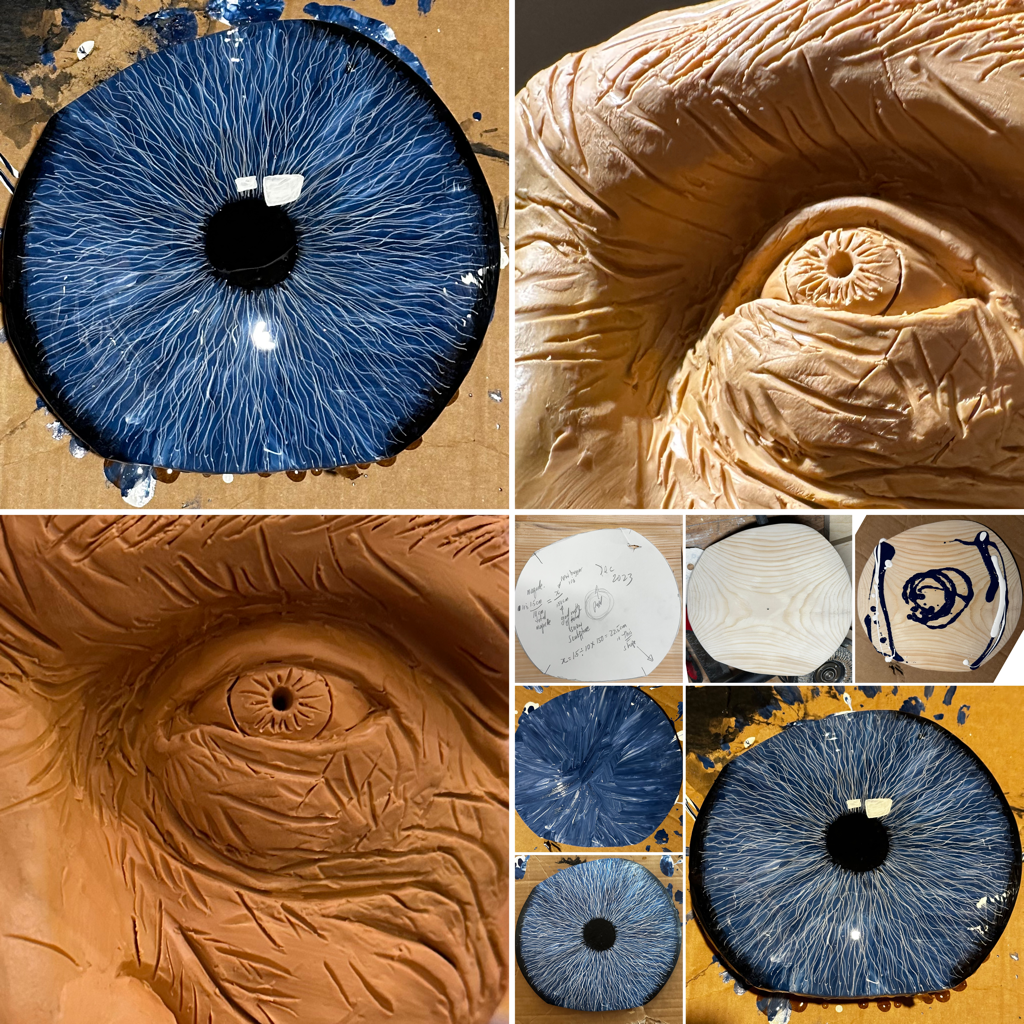
This group of pictures also shows the maquette (model) that I created out of plastalina. It makes it so much easier to carve when I'm out on the snowbank. Check the Yearly Summary for ealry 2024 for more on this carving.
|
