Snow Forms!
|
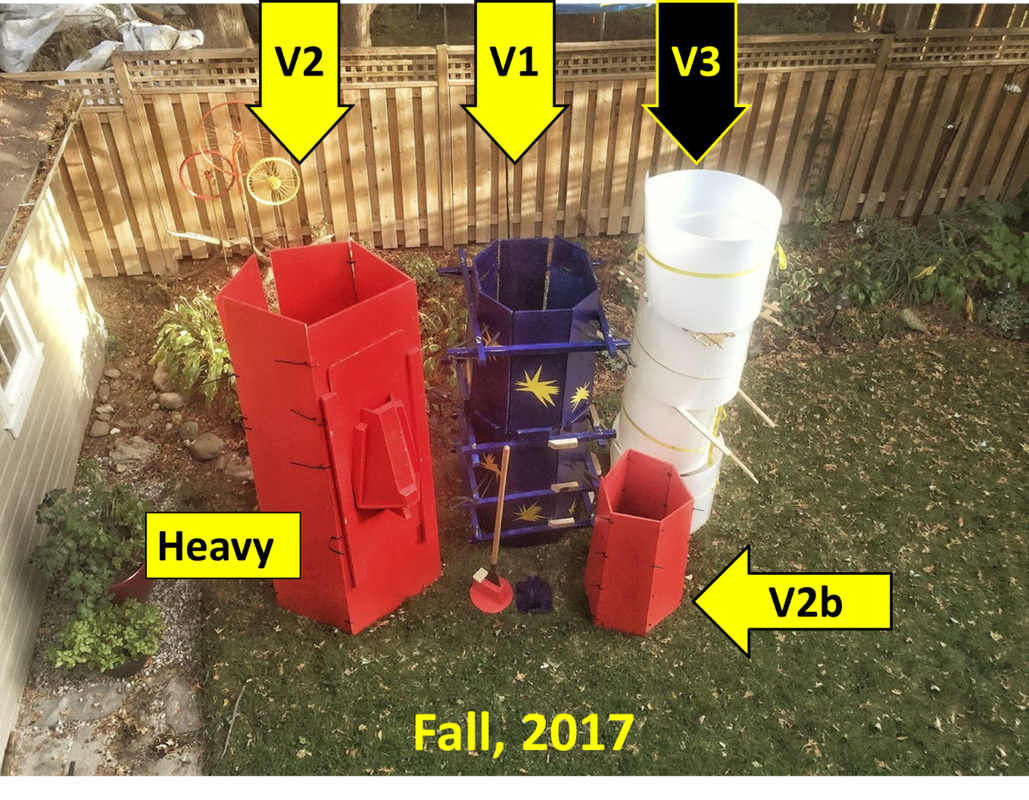
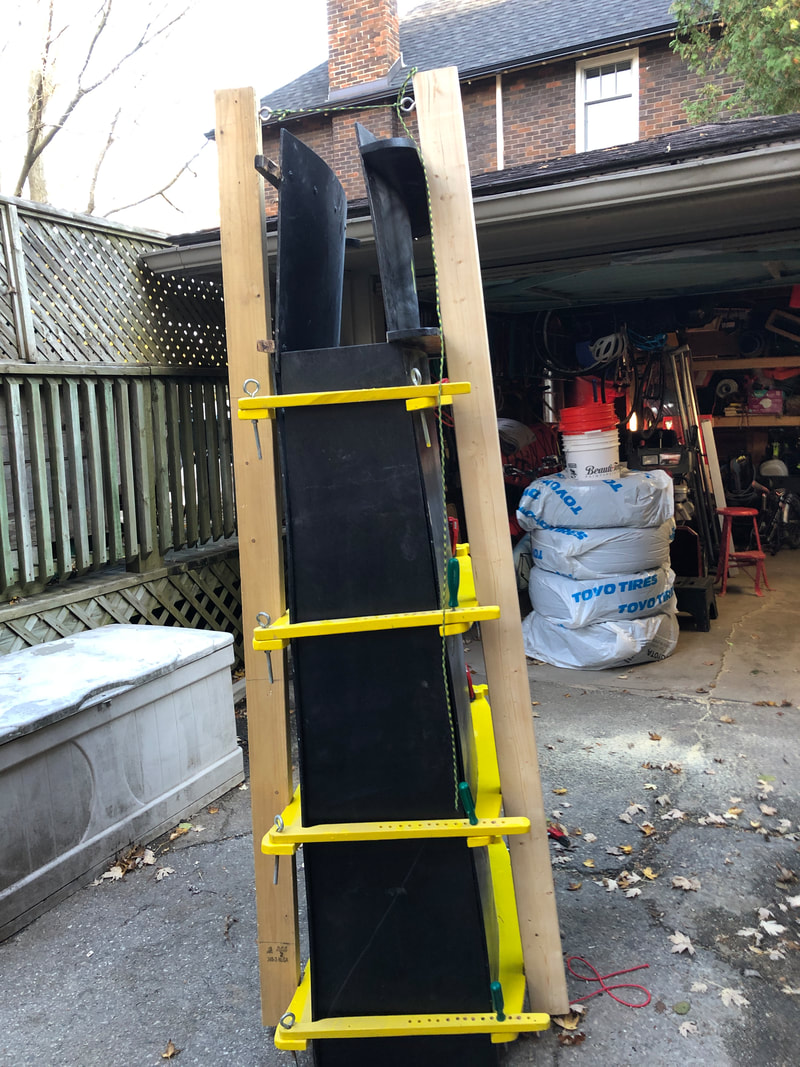
I’ve developed a number of different snow forms over the years.
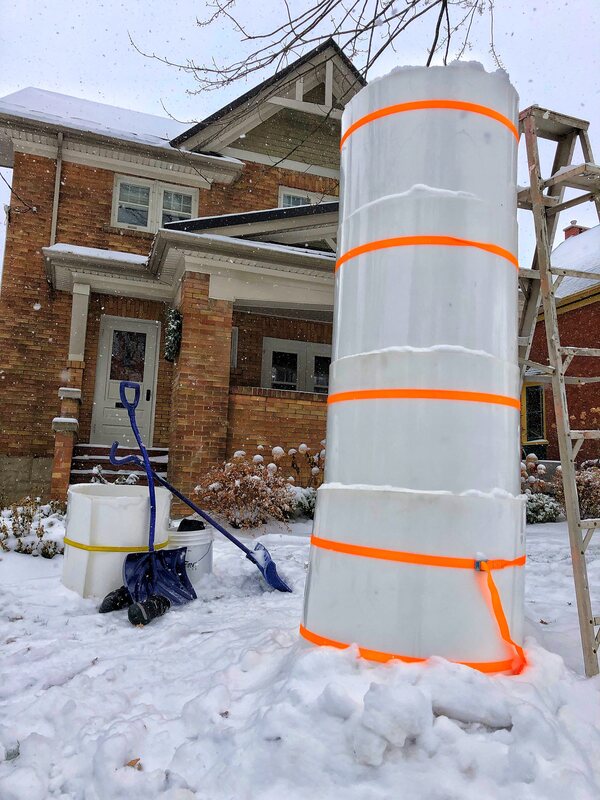
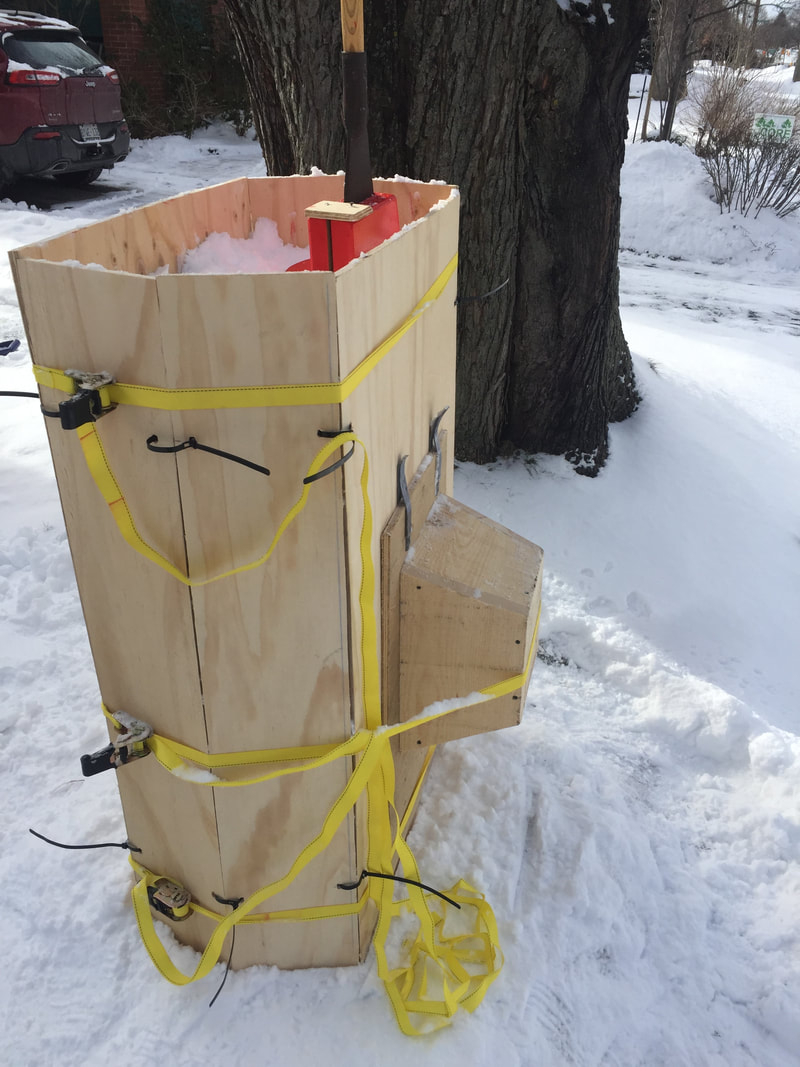
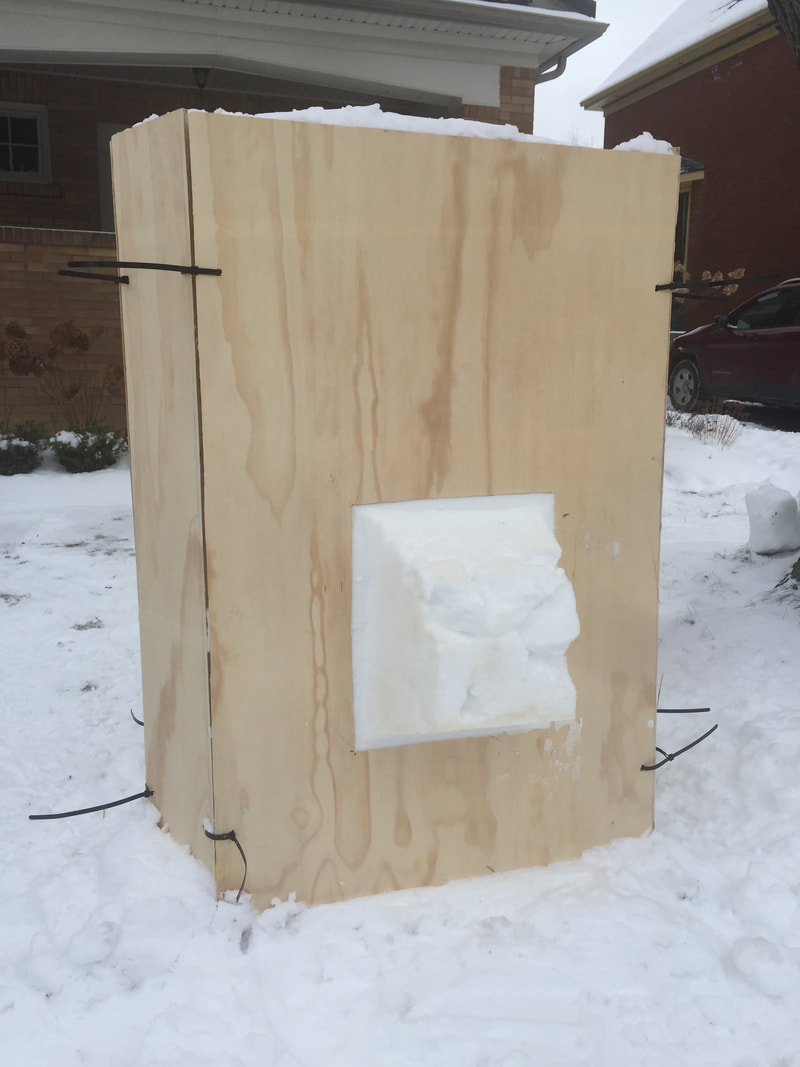
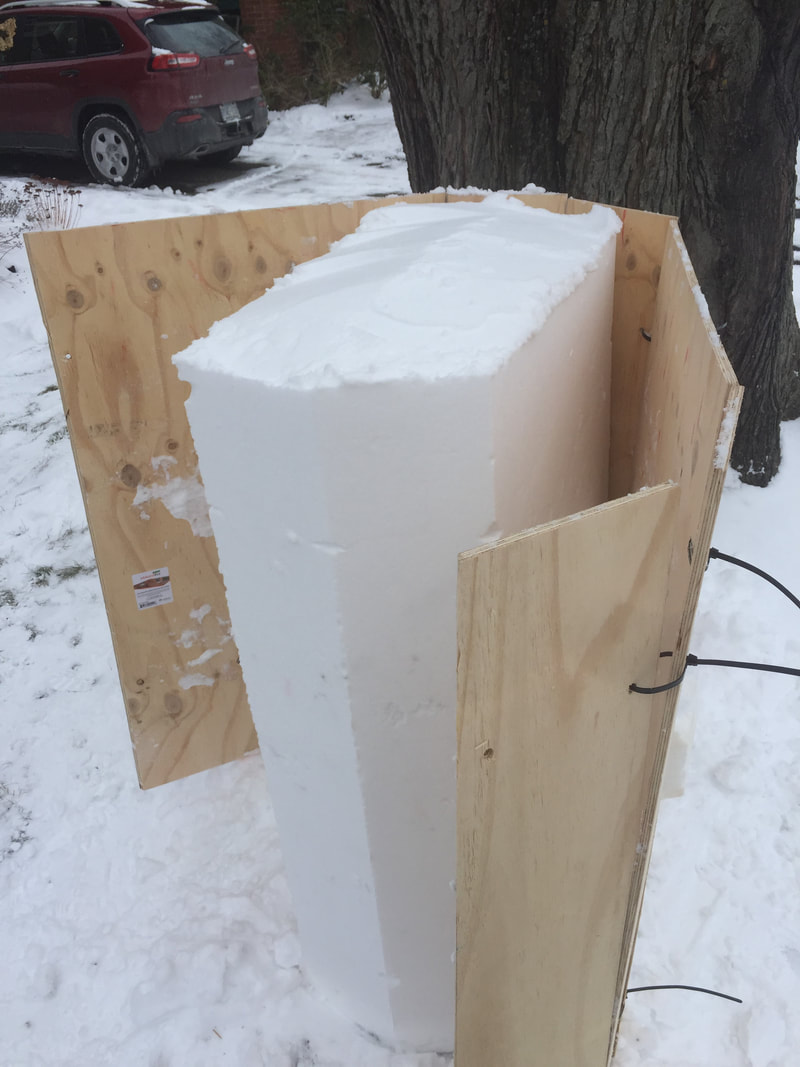
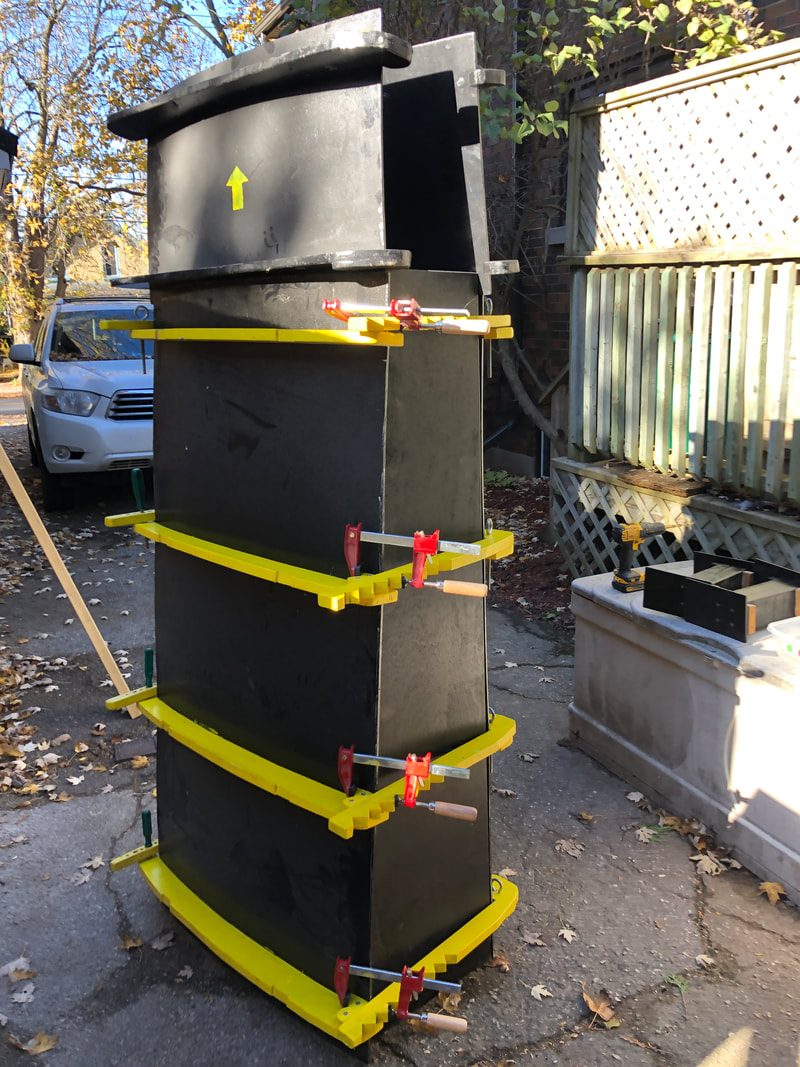
The blue plywood form shown was my first and was inspired by the Henri Matisse painting ‘Icarus’. The second (red) plywood form met my desire to go taller and add an adjustable nose cone, as well as experiment with releasable zip ties. The nose cone was great. I called it the XL9000. But the form ended up being heavy and cumbersome. The little red form (V2b) is one I made for my grandson. He and I have lots of fun on the bank and he loves to carve. It’s pretty tough to get him inside, even when it’s very cold out. But eventually the idea of hot chocolate with his Nana takes hold, and in we go to warm up! The third (plastic) form is my newest creation. It’s light and easy to manoeuvre. It’s also easier to go higher. For those who want specs: 3mm HDPE. Buy a 4x8 sheet and have them rip it into two 2x8 sheets. It's like a thick, 8’ long crazy carpet. I sand all edges, especially the corners, for safety. Feel free to review this entire page. I summarize many different types of forms and maybe you will be inspired to create your own form! |
|
|
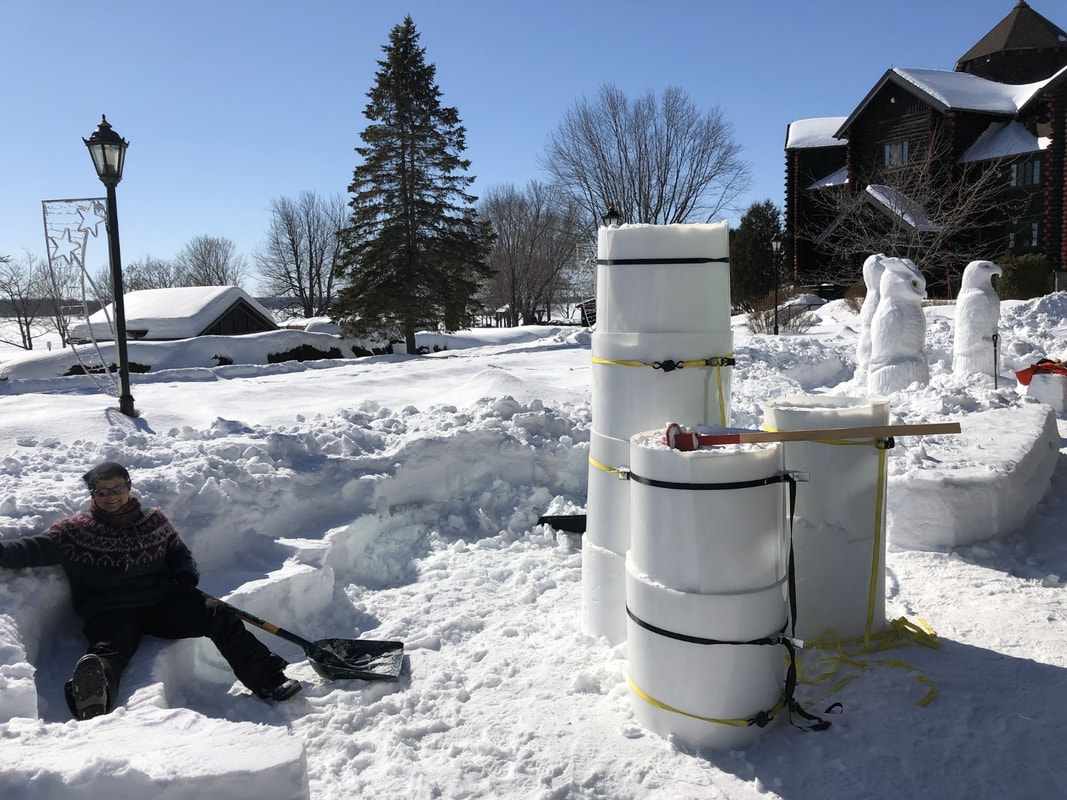
Building sculptures at Fairmont Chateau Montebello, Quebec. Spring 2019.
|
Using a 5 gallon pail as a form!
A pail can be a snow form!
Pails are awesome as a starting point. To review the effective use of pails, click on the SNOW SCULPTING CLUB menu item above.
Or simply click here for a one page summary of the entire process.
Pails are awesome as a starting point. To review the effective use of pails, click on the SNOW SCULPTING CLUB menu item above.
Or simply click here for a one page summary of the entire process.
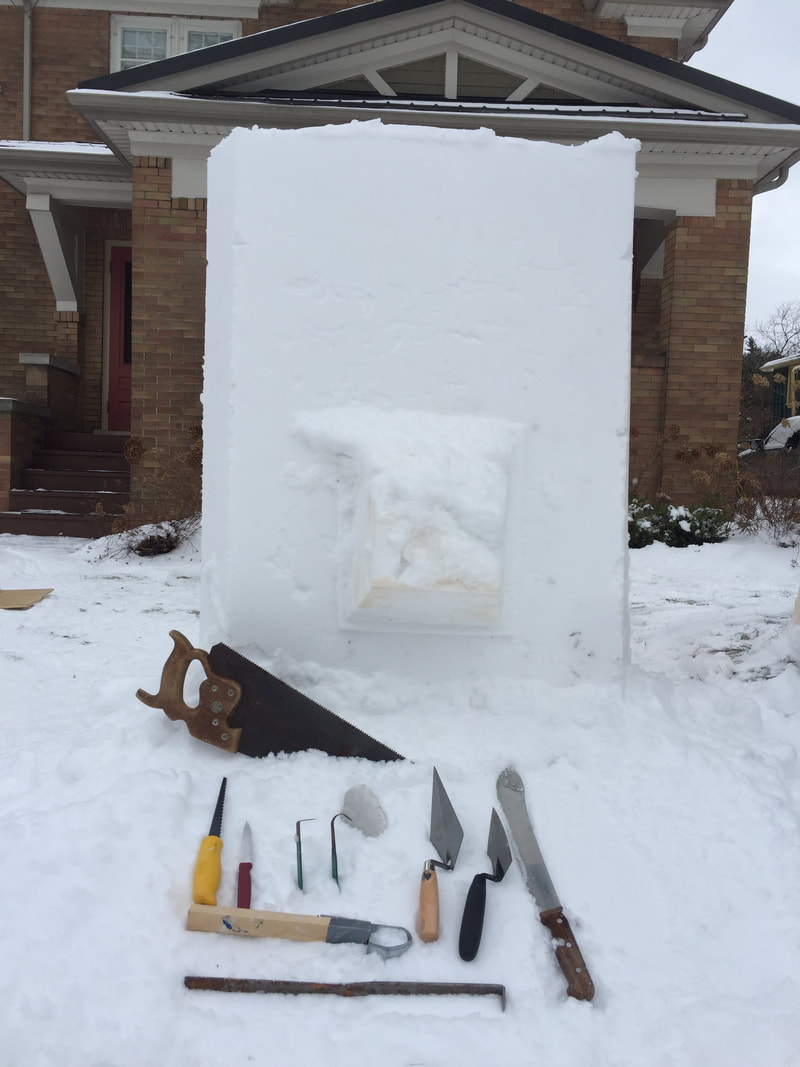
I want to build my first plywood form!
If you have decided to go to the lumber yard to get started, here is what you might do:
Purchase one 1/2" sheet (4' X 8') of plywood. Most lumberyards will give you one free cut. Have them cut it into two squares of 4' square each. This will make it easier to tie the wood onto the roof of your vehicle. Better yet, convince them to rip it two more times so that you end up with 4 'panels' with measurements of 2' x 4'. These will probably fit IN your vehicle.
When using your new form for the first time it's a bit tricky to get it started as it will want to fall apart.
One idea is to drill small holes in the top corners of your panels. Then place the panels in approximately the correct position for the build and use 'releasable zip ties' to temporarily hold the top corners together. Releasable zip ties can be bought at places like Lee Valley Tools for a reasonable price. They are great because they can be reused.
Next, start shoveling in some snow and packing it with a pounder. As you begin the process, you will need a stronger hold on the bottom part of the form. Ratchet straps can help, but rope also does the trick. Study the truckers hitch knot which will help you reef down the rope to hold your tower in place. For a 4' tower you would ideally like about 3 ratchets or ropes. One for the middle and two more about 8" from the top and bottom. Note that I suggested you shovel in some snow prior to the tie down. This helps put a bit of outward pressure on your panels so that when you ratched or rope down the form, the snow will help it resist the temptation of collapsing into the middle.
Now continue with the build process. You might be excited that your form is holding together and that the process is working. But stay focused. You want to pack that snow in well as you fill the form. And you must let it sinter before taking off the forms. Work hard and then go in for a break. A few hours later, or even the next day, dress more warmly than you did the first time and then get out there and have fun carving!
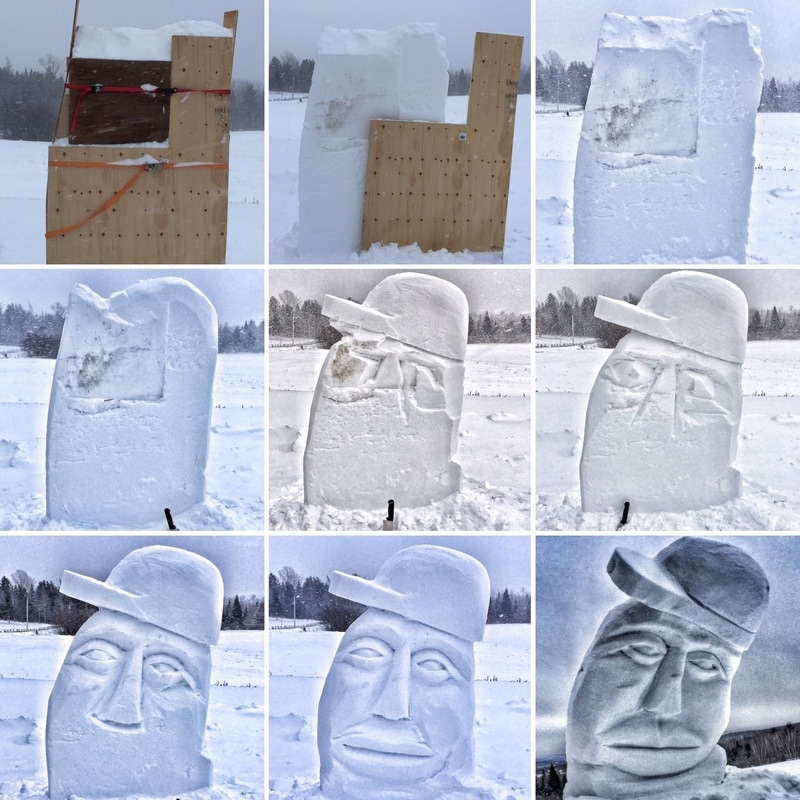
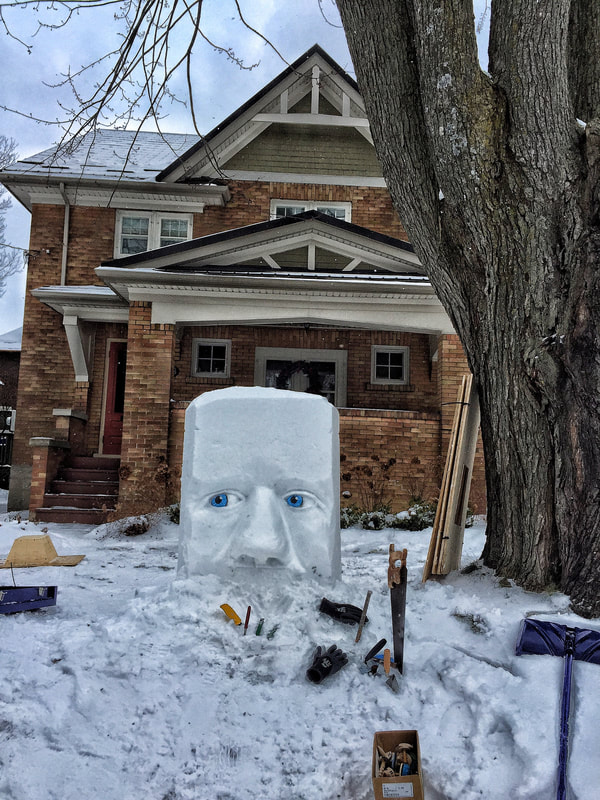
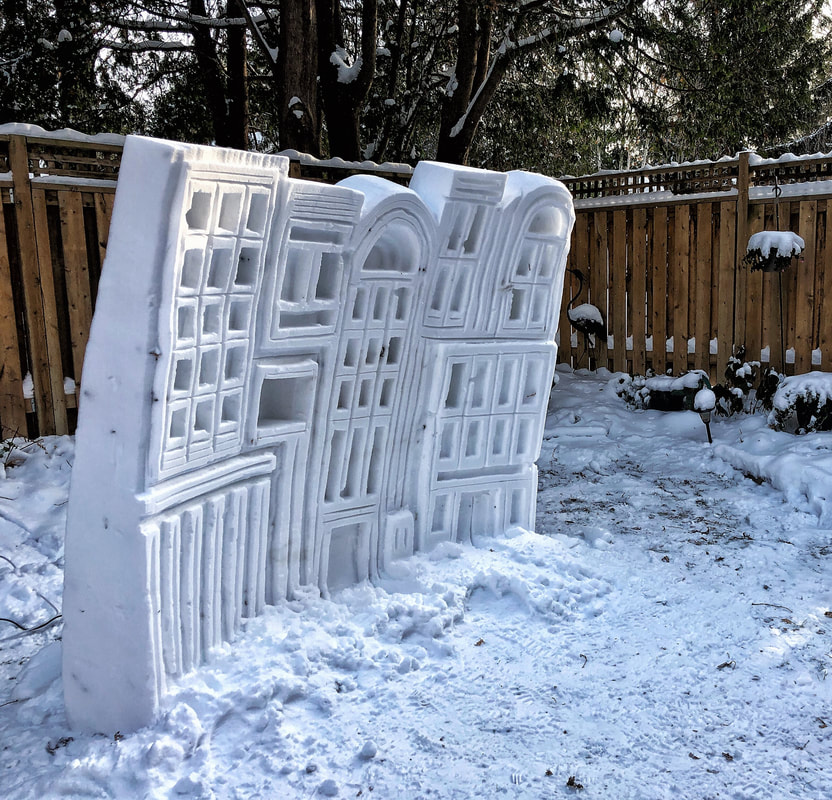
Building with scrap plywood
Almost any plywood is good plywood for snow sculpting forms! Here are some examples. The pictures tell the story!
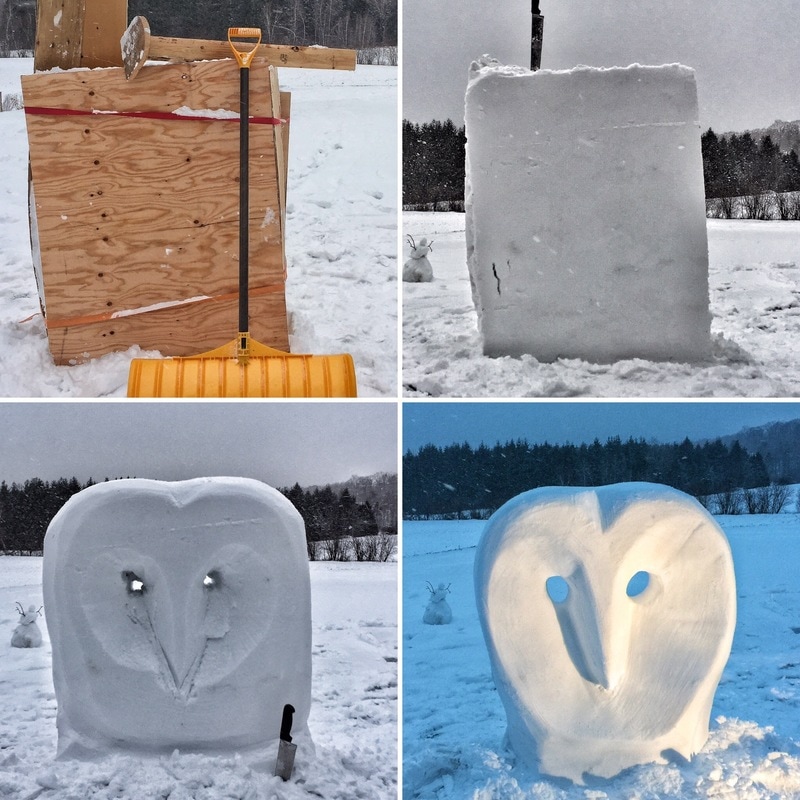
Owl. Sutton, Quebec. Christmas, 2016
|
Hip Hop Humpty. Sutton Quebec. Christmas, 2016
|
Many first-time snow tower builders will want to use plywood. It’s cheap and easy to source. Committing the money to plastic forms is not practical for many, and plywood is a great product for this purpose. Sometimes there are spare sheet lying around from previous projects.
Pictured above is an owl I carved in Sutton, Quebec. We were visiting family and wanted to get outside to have some fun. My brother-in-law Michel found a few old sheets of plywood in their barn and away we went! I think it was ½” thick which was fine as were the two old ratchet straps we ratchet straps we found to hold it together.
We also found a piece of 2 x 4 and a little piece of wood to screw onto the end to make a pounder. You have likely read elsewhere on my website the importance of packing in the snow and letting it sinter for a few hours.
For the owl project we shovelled in some snow, pounded it in to sinter, and let it bond for a while. Then we carved a simple owl—my sister-in law Michelle’s favourite! The owl shown is actually one of the easiest carvings to have success with. For this carving, I used a really big knife that I borrowed from my wife Lorna. It’s about 14” long. First I dug out two eye holes. Then I just starting rounding out the shape. But warning—if you are going to use a big sharp knife, safety is paramount. Children should absolutely not be doing such a thing.
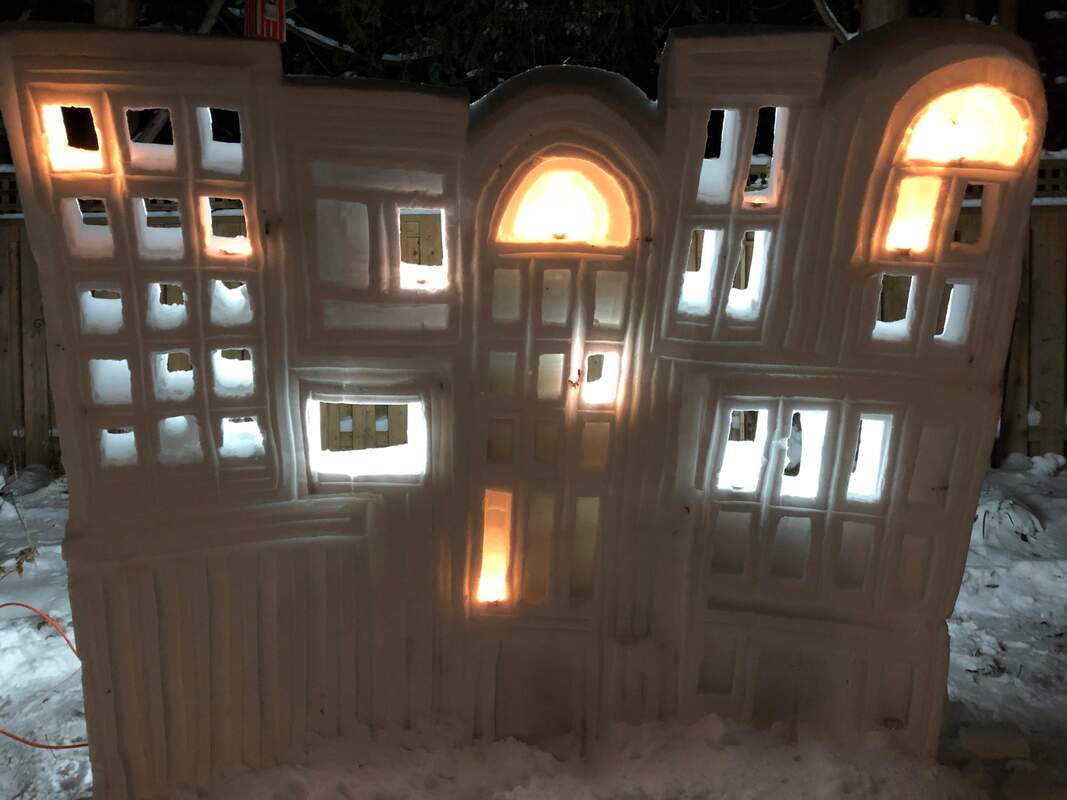
You might notice the white spotlight we put on it a night to great effect.
Pictured above is an owl I carved in Sutton, Quebec. We were visiting family and wanted to get outside to have some fun. My brother-in-law Michel found a few old sheets of plywood in their barn and away we went! I think it was ½” thick which was fine as were the two old ratchet straps we ratchet straps we found to hold it together.
We also found a piece of 2 x 4 and a little piece of wood to screw onto the end to make a pounder. You have likely read elsewhere on my website the importance of packing in the snow and letting it sinter for a few hours.
For the owl project we shovelled in some snow, pounded it in to sinter, and let it bond for a while. Then we carved a simple owl—my sister-in law Michelle’s favourite! The owl shown is actually one of the easiest carvings to have success with. For this carving, I used a really big knife that I borrowed from my wife Lorna. It’s about 14” long. First I dug out two eye holes. Then I just starting rounding out the shape. But warning—if you are going to use a big sharp knife, safety is paramount. Children should absolutely not be doing such a thing.
You might notice the white spotlight we put on it a night to great effect.
Early form use
This section is filled with videos for those who really want to study form use in action.
Specifically, these videos focus on the use early use of my plywood forms.
Specifically, these videos focus on the use early use of my plywood forms.
|
|
|
The first snow form was comprised of a 4' bottom section and an optionaly 3' top section. It's all about packing in the snow and giving it time to 'sinter'.
|
|
|
|
|
|
Portable form:
A number of years ago I wanted an easily transportable form. So this is what I came up with.
It folded well, and the nose cone allowed for.......wait for it......a nose!
Update: I have since cut this up to make QP7000 snow pounder bottoms.
It folded well, and the nose cone allowed for.......wait for it......a nose!
Update: I have since cut this up to make QP7000 snow pounder bottoms.
|
|
|
|
|

|
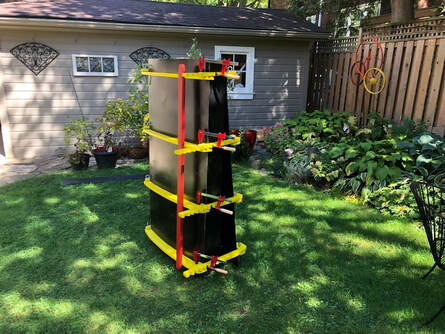
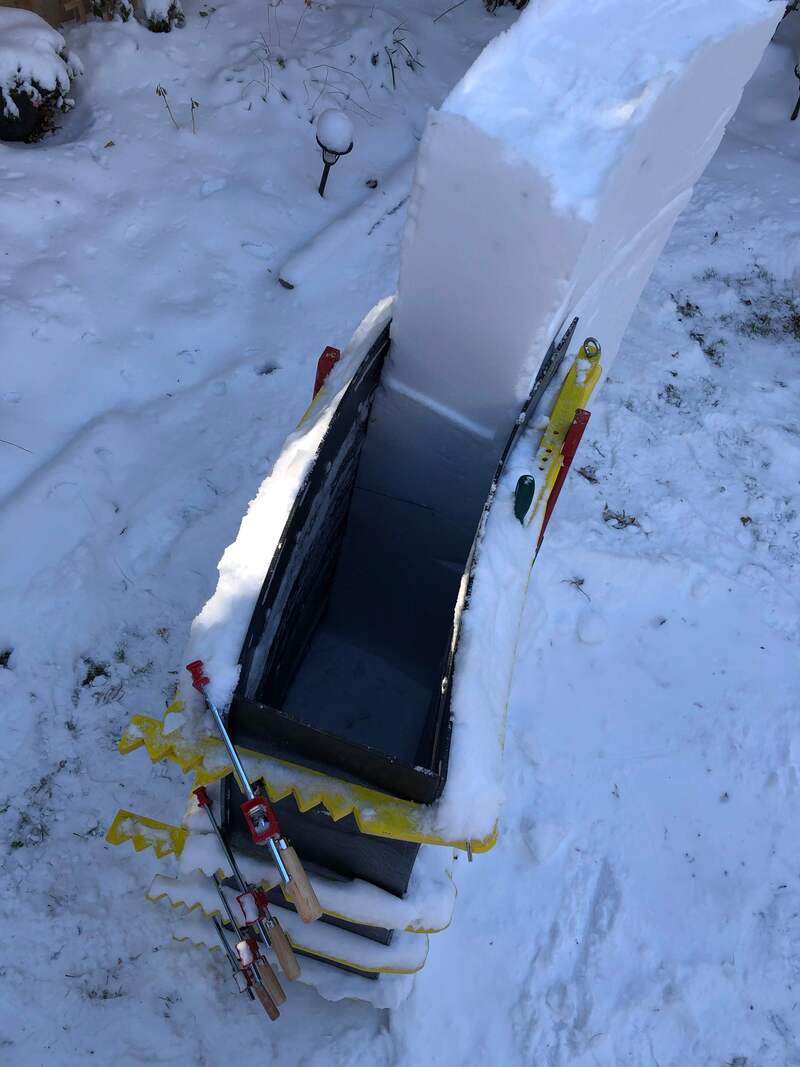
New snow wall form
Through the summer of 2019 I had been planning a new snow form that would allow me to build a wall of snow. By mid September, I had it built. The 'wall' form is 5' tall an just 2'6" wide. It has a slight curve to give the final wall stability. When I use it this winter, the first wall built will (obviously) involve closing off both ends. Once the snow is packed in, one end wall is released. The form is ‘slipped’ along, away from the first wall segment, and the next section of snow is pounded in right next to the original piece of wall. But without the end wall 'ribs', how do I keep the wall together? There will be packed snow where the ribs use to hold together the two walls. Without support, the wall on the 'snow' end will start to push out on each outer wall.
The solution was to look at the cement forming business who place thin bars through the wall. These bars are bound on the outside of each side, thus holding the wall from expanding under pressure. Anything going through the wall will leave a hole in the snow once removed. So the pierce should be small. I decided not to use traditional cement forming bars. Instead I considered rope.
I visited MEC and had a great discussion with their rope specialist. She ended up selling me 3mm nylon (blue rope in picture) static cord with a break strength of 180kg. Incredible. The cord (in two positions) will go through the form near the open end (snow end) and pierce the red vertical ‘beams’. Once tied off, the red vertical beam, held by the static cord, will hopefully hold things together.
If I continue make wall segments, the curve will eventually come all the way around and complete a circle. I wanted just a gentile curve to give the snow wall stability. To get the right arc for the form, I marked the curve with a pencil, attached to 90" of string that rotated around an axle (nail) imbedded in dirt. I tried various radii, but 90" seemed to be about right.
Extra:
Using basic math, a 90" radius will create a 47' Circumference. We will need a team of workers to pull this off! We will also have to dig a tunnel through the wall to get inside!
|
|
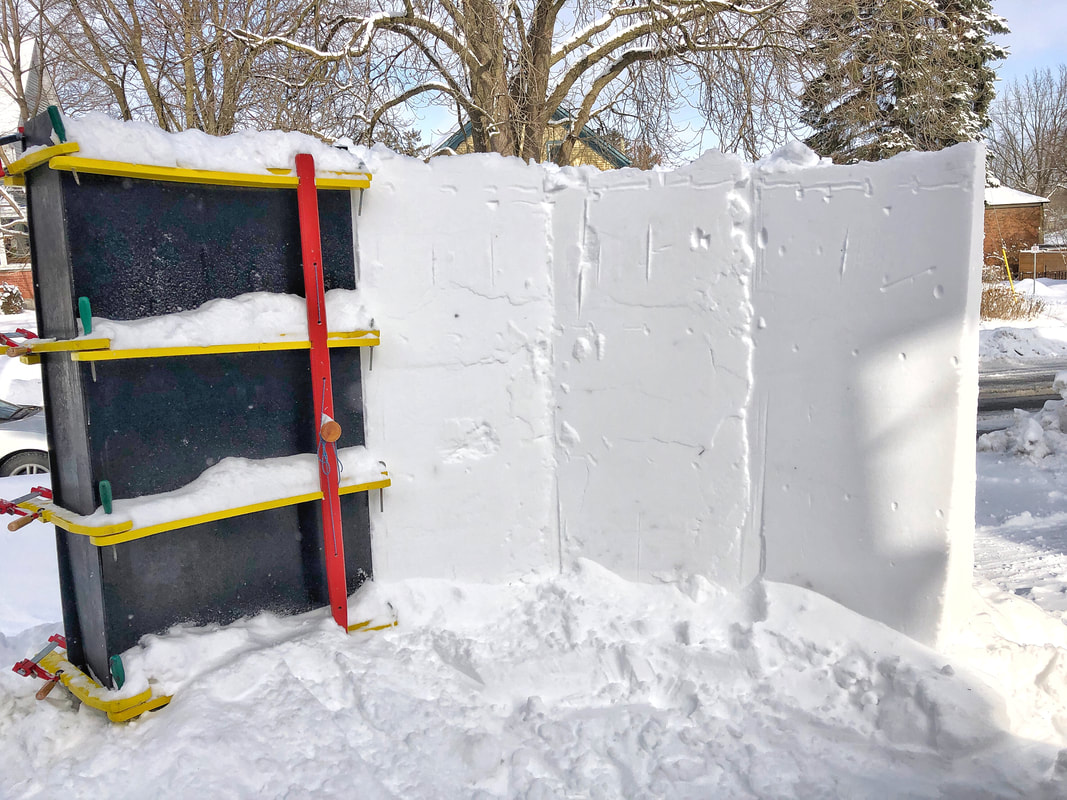
Here is the inside view of my wall form. It was the first time I made 4 sections. It was used as the basis for my 'wall of babies' carving.
|
The form in action for the first time! This photo shows the form in it's second position. The first wall section is complete, the form is released and slid to the second position. If you look really closely, you can see one of the 3mm ropes about a foot down the form. The left side of the rope is visible while the right side starts to get a little bit hidden in the snow. Just two little ropes are all that is holding that end of the wall together!
|
The first trial wall! November 12, 2019. It started with a tilt and eventually crashed down on me!
|
|
|
Adjustments to the Wall Form: Summer of 2020
The wall was a success last winter. The special form was about 5 1/2 ' tall and could go as wide as I wanted. It was basically a form that allowe me to build a wall. Pretty simple. But it was time to go taller. I had build an extension to make it taller but it was not a robust design. I decided to make it robust and simple. In the end, I now have two 2 x 4's that bind together the open end. And the wall can now tower 6'4" above the ground. |
|
|
Adjustments to the Wall Form: Summer of 2021
|
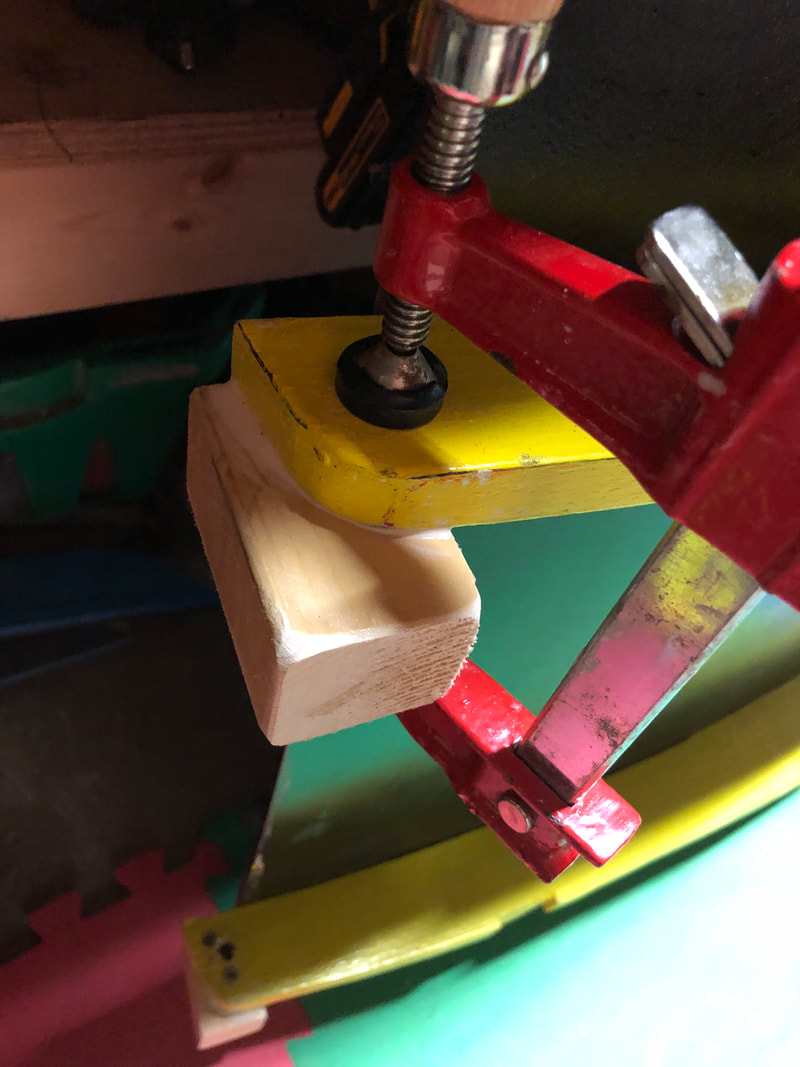
The tall 2 x 4's never really worked. A great failure and lessons learned. So in the summer of 2021 I decided to change it up again and improve the design to use two long clamps. I had played with the change during the previous winter, but for the clamps to hold properly, blocks would need to be installed to provide a better clamping position. The displayed picture doesn't show much, but suffice it to say I now have a way of attaching the two bar clamps in a way that will stop the wall from falling over!
|
|
|
Snow Block Maker:
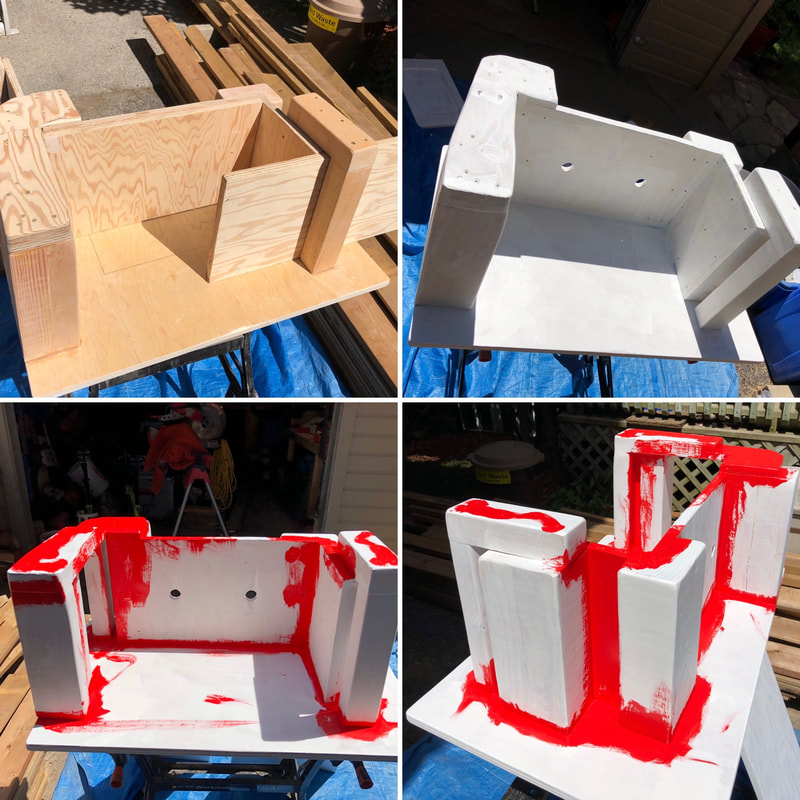
The snow block maker was my attempt to create a device that would help the user make good sized snow blocks expeditiously. I built it in the summer of 2020 during the pandemic! I thought about the design for some time and eventually came to the idea of having two sides that could be pulled off once the snow was compacted into the box. The pictures here show it partially painted. I'll wait for snow to unveil how it looks today. It is unknown whether it will be a success, but the design and build was fun! Update: January 2024. I made a video of the one time I used this form. See below. |
|
