Snow Pounders
The best carving snow is non-packing or dry snow. Packing snow can be used but it sometimes becomes hard to carve. Non-packing snow is a dream. The key though is to pack it. Packing it in makes sure the snow locks together. This process is called ‘snow sintering’. The 'pounder' makes it possible. Read on!
Bonus: If you decide to Google ‘sintering’ ensure you actually type ‘snow sintering’.
Bonus: If you decide to Google ‘sintering’ ensure you actually type ‘snow sintering’.
Quarter Pounder: QP7000
|
I developed what I call the Quarter Pounder to help builders have success making a small carvable tower of snow using a pail as the starting point. The process is outlined within the SNOW SCULPTING CLUB menu item. In the fall of 2020 I gave a free QP7000 to over 60 neighbourhood families.
Riverview, New Brunswick has now made over 500 of my pounders to give to community members! And a local school board has made 200! Here I’ll just outline the idea behind this pounder and provide some build guidelines. I wanted better success compacting the snow, especially at the edge of the pail. This is where a lot of the carving action happens. We want a beautifully consistent edge. You might notice that this little tool has a curve that matches the edge of a standard 5 gallon pail. That's the whole secret. Good results can be obtained using a block of wood or even your mittens. But for great results, I encourage you to make a custom pounder that will match up with the pail you plan on using. For additional reading, check out "GOOD TO GREAT" by Jim Collins. Hints on making a great Quarter Pounder: 1. Trace the bottom of the pail you plan to use onto a piece of scrap ½” plywood. Since you have traced the entire bottom of the bucket, why not make four pounders?! They make great gifts to others and the incremental cost in materials and time is almost zero! Other plywood thicknesses can work too! Ensure that the pounder surface is about 1/4 of the pail. That makes it easier to call it a Quarter Pounder. Calling it a Third Pounder or an Eighth Pounder would just sound weird. I have made pounders that covered almost the entire bottom of the pail, but this led to less than ideal compaction. This smaller pounder ensures that any voids are busted up. 2. Cut out the shape using a jig saw or other method. Make sure you are wearing safety glasses and ear protection. As I get older, I realise how important this suggestion is. Safety first! If you don’t have access to tools, consider exploring tool lending libraries. In Kitchener-Waterloo there is a tool lending library called: KITCHENER-WATERLOO Library of Things. 3. Sand the edges using rough sandpaper. 80 or 120 grit works well but use what you can find. 4. Find a scrap piece of wood for the handle. I think 18 to 20 inches is about right for length. I used hardwood for my first set. A piece of 2x2 could work or even 1x1. Do some testing. You don’t want much flex. When I made a batch of 50 pounders, I started with a good quality spruce 2x4. Sand smooth. 5. Find a little wooden ‘block support’ measuring roughly 2” x 2” x 3”. Sand off some of the sharp edges except for the bottom where it will meet the pounding surface. Assembly: A) Plan where the block should be screwed onto the pounding surface by viewing the included pictures on this website. Put wood glue on both surfaces and use your finger to push it around to cover all surfaces that will come into contact. Next, screw through the bottom of the pie shaped pounder surface into the block using one rust free screw such as a 1 ½” deck screw. No predrill is required. The glue will provide most of the strength. The main purpose of the screw is to hold the two parts tightly together while it dries. B) Next, drill a generous pilot hole about a 1 ½” from the end of the handle for the one screw that will attach it to the support block. If possible, use a countersink drill bit so that the head of the screw seats nicely into the handle without splitting your new handle. Apply wood glue to the attachment area and then carefully screw the parts together ensuring proper alignment. If you have used a fairly slim piece of wood for the handle, do the final tighten by hand as an impact driver would blast right through. Allow a 24 hour dry time for every glued set. Dry your work inside if it’s cold out. Optional: Paint with the colour of your choice. Avoid white so that you don’t lose it in the snow. If you desire to use two or more colours, use painters tape to help make a nicely defined edge. You could consider primer included paints. A value conscious sampler paint can from a big box store is a good option here. Or scope out some used paint from many sources. Then again, leaving the wood natural might be better for the environment. Time to get outside and have fun in the snow! Full instructions (similar to the above) in PDF format found here. 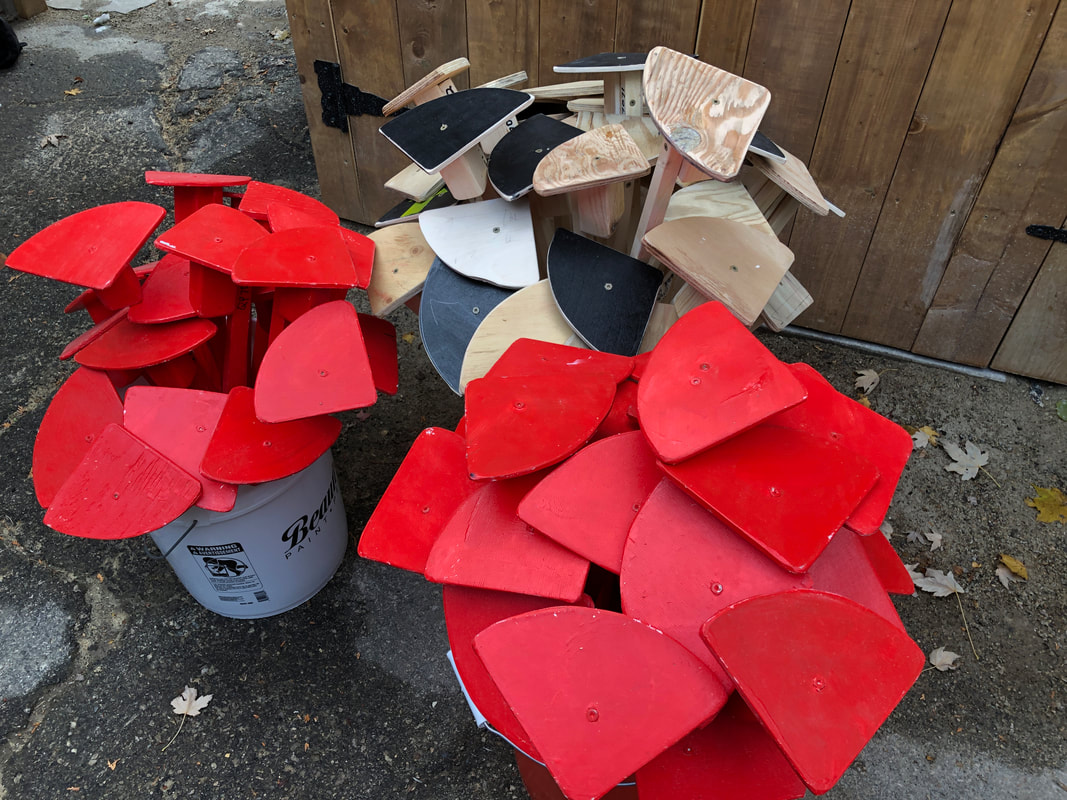
|
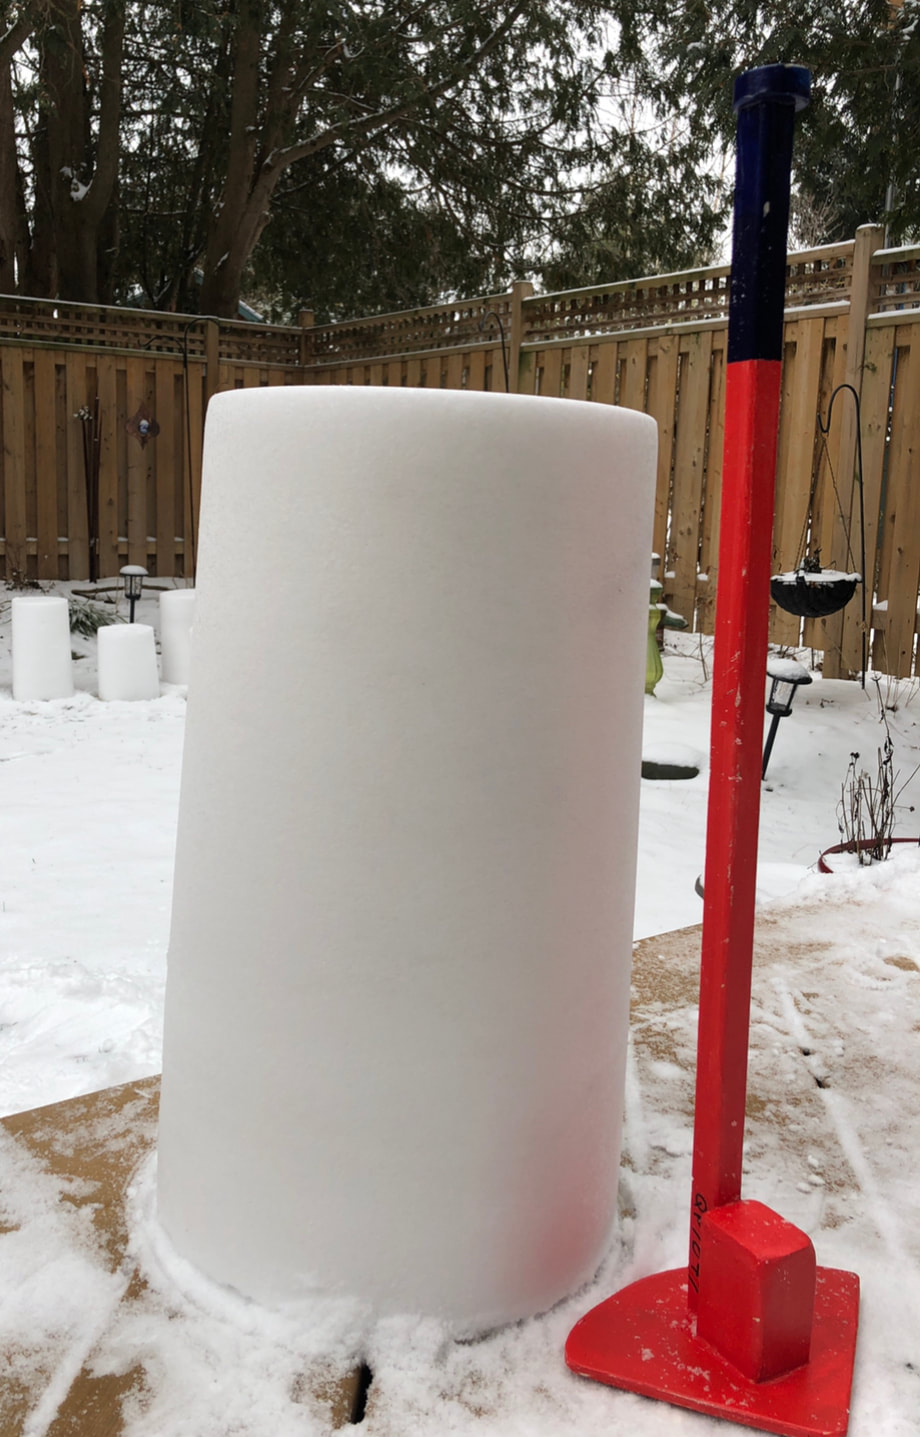
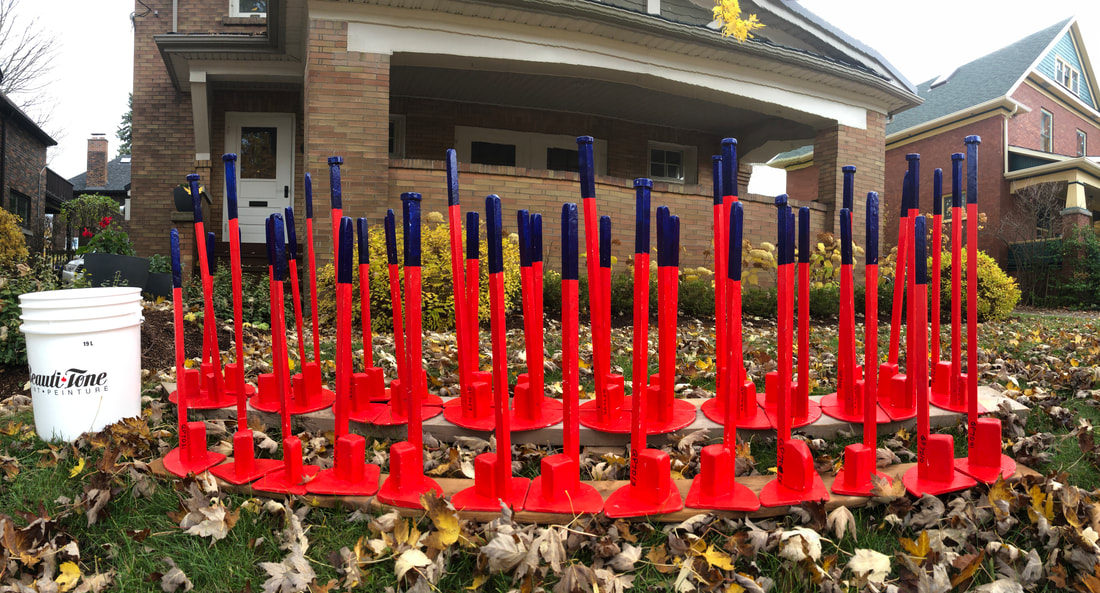
Can you believe that the above mini tower of snow use to be fluffy non-packing snow? What a joy to carve such a consistent medium. But only after a good sinter!
Here is a set of four I made in December of 2019. I gave three away to young neighbourhood kids who showed a real interest in learning about snow sculpting. I kept one for my grandchild and I to use. I guess technically you are looking at QP7001, 2, 3 & 4.
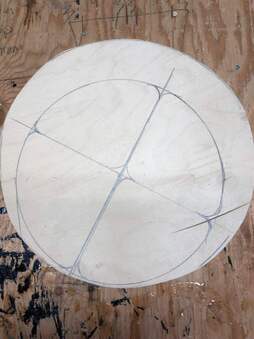
Piece of scrap plywood. I put the pail on the wood and traced the entire circumference. Then I roughed our 4 pounders. All edges rounded to reduce injury risk. Use a jigsaw, or other tool, to cut out the shapes.
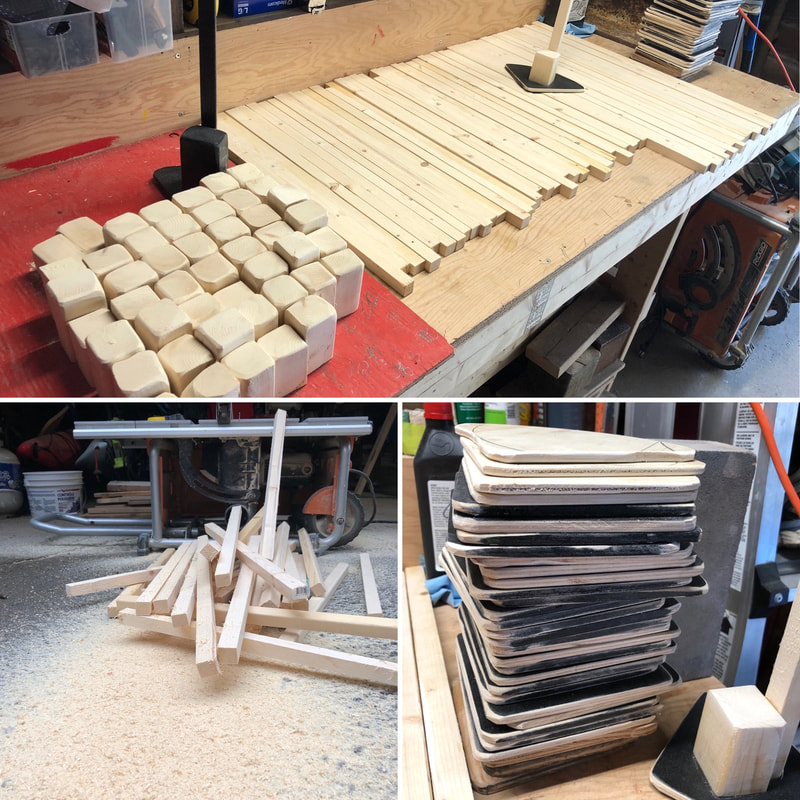
So many needed! So little time!
|
Wall Pounder: WP6000
|
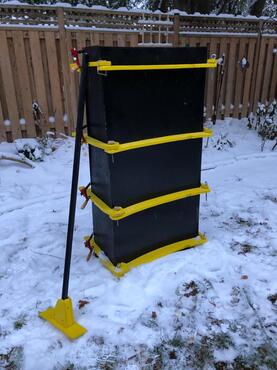
I made a new pounder for use with the wall form. Pictured here, it is a rectangle with a bit of a curve to match the wall curve. It helps pound in the snow to ensure proper compaction. The pounder has quite a long handle to ensure I can pound to the bottom of this 5' tall form. Check out the BUILDING WITH FORMS page for more on the wall form!
|
|
Snow Pounder: SP5000
|
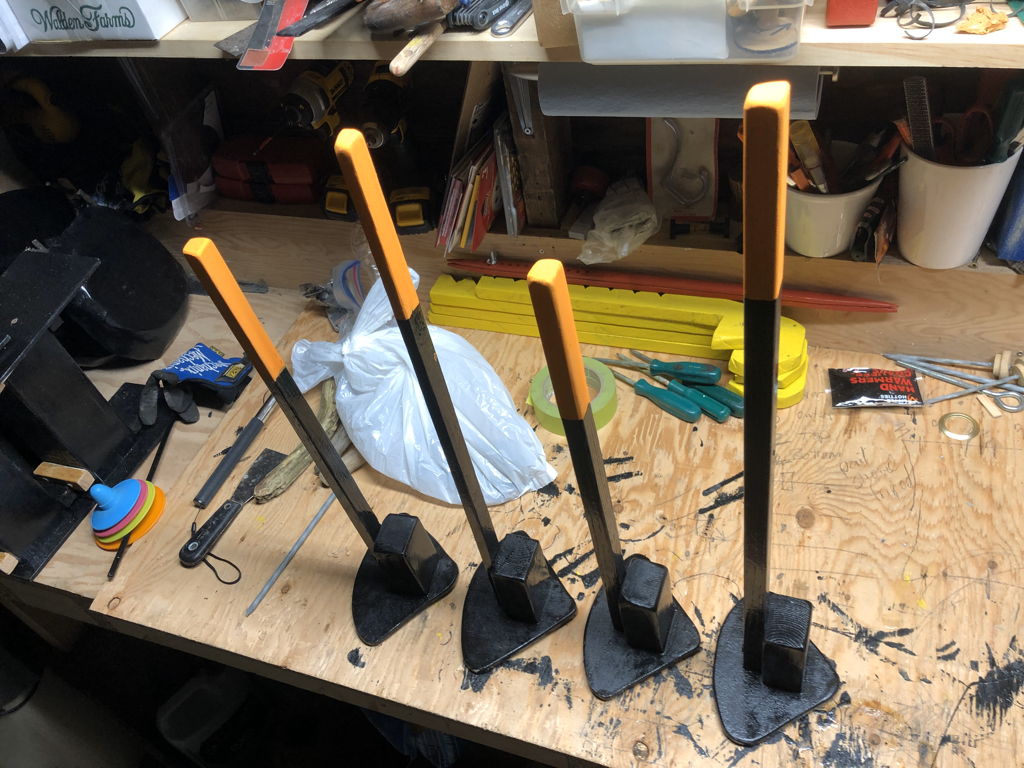
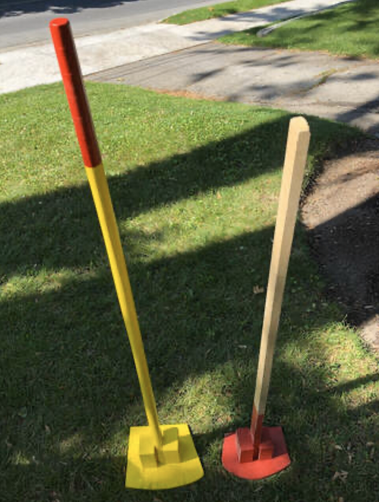
I created my 5th pounder. Ideally I’m packing in NON-PACKING snow. In the displayed picture, the right (red) one was a design breakthrough compared to my first three pounders. The latest (yellow) one on the left is the result of continuous improvement.
The improved design includes: 1. Rounded and sanded shaft for better grip and time saved. 2. Slightly large pounder surface to improve compaction and speed for better carving results. 3. Better arc on the pounder edge to match the actual curve of my round form. Less chance of loose snow on the outer edge, which could lead to carving trouble. 4. Still a 90° angle should I find it necessary to compact within a square form leads to excellent compaction even on corners. 5. Glued and screwed construction with pre-drills on all holes to reduce the chance of splitting or tool degradation. 6. All edges well sanded to avoid injuries. 7. Slightly heavier for perfect compaction. 8. Colourful paint to avoid losing it in the snow. And it just looks good! There is some debate on whether a pounder should be heavy or light. This debate often relates to sand compaction. I vote for light as it still gets the job done and I’m less tired. I’m almost 60 and I’ve got to keep in mind how I’m going to keep at this for another 30+ years. The somewhat longer handle was included as I’m considering a new form where the first section is 5’ tall. I’ll be able to use this pounder effectively while only having to use a small stool to gain an ideal pounding position. The light weight makes it easier for kids to have success. |
|
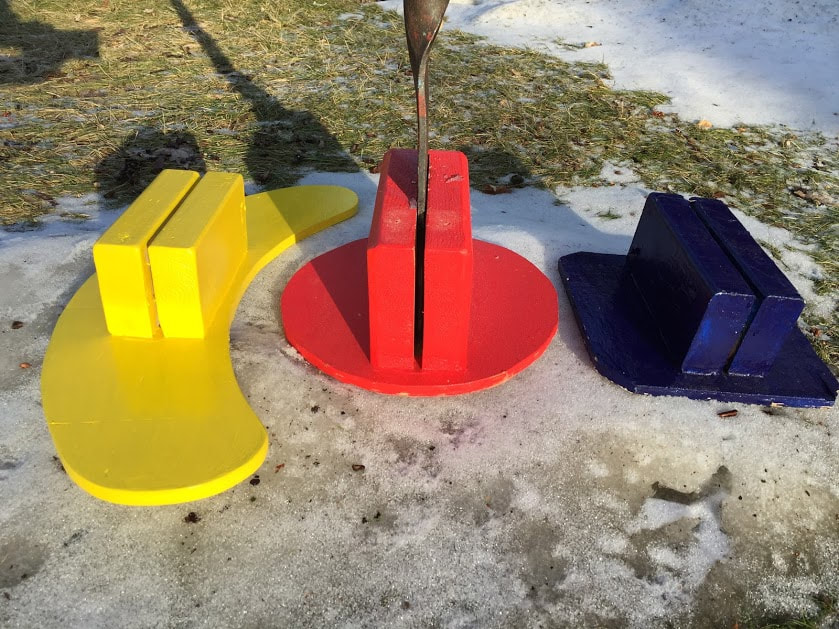
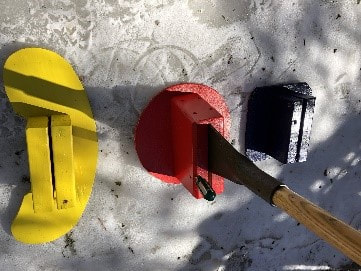
Early snow pounders:
I have used a variety of pounders over the years. I started with a blue square of wood (see picture). A sleeve of 2 x 6’s hugged a heavy ice chopper.
The next year I moved to a round (red) pounder so that I could pound more effectively into the round forms I had developed. If you look closely at one of the pictures, you can see an old green handled screw driver in the red pounder. This screw driver slides through a hole positioned just right to hold the ice chopper in place. The angle of the hole means that the screw driver slides past the ice chopper and wedges it in the slot. This is only possible because the bottom of the ice chopper is wider than the top.
The last iteration of this approach was the banana (yellow) pounder that really followed the shape of my round form. I’m pretty sure I still own the world’s only banana pounder for use with snow. But all three of these pounders are pretty heavy as this ice chopper uses heavy steel.
Once the snow is pounded in, it must 'sinter'. The colder the temperature, the longer it takes to sinter. Sinter means 'bind' or 'meld' together. Once it's sintered, the carving begins!
|
|
